FFXIVGuild YouTube channel LAUNCHED!

FFXIVGuild is expanding to the world of VIDEO! Watch our first official video: How to beat Garuda, Lady of the Vortex!!

First of all we would like to say that the FFXIV YouTube channel is launched! Yes! To commemorate that, we give you this AWESOME VIDEO:

Do you want more vids like this? Read on…

Did you know the guy who edited that awesome video, was the same guy who:

  • Typed up more than 100,000 words for this site, for YOU.
  • Learned Adobe Premiere (just 2 days ago) to edit videos for YOU.
  • Gathers and processes information for new guides for YOU.
  • Webdesigns, moderates, optimizes pagespeed and edits images for YOU.
  • Is also the head WRITER, EDITOR and SPELL/TYPO checker? (Who inevitably fails)
  • Who relentlessly tested recording/rendering/uploading settings…
  • Who uploaded his FIRST YOUTUBE VIDEO -> This piece of crap (FFXIVGuilds 1st vid)…
  • Into that video you see up there. 

THIS SAME GUY, FFXIVGuild’s very own MAHIKO, my  biological younger brother. 

  • Is the LOWEST LEVEL core-member of FFXIVGuild, Level 45, when he could have been 50  ages ago.
  • ….“but why is this amazing white mage only level 45!?”
  • Sacrifices his precious free time – which could be spent in Eorzea…

To deliver content to YOU.

Well (much well) over half of ffxivguild.com… every word, edited image, conceptualization, number crunch, theorycraft, IP whitelist, comment moderation, reply, user interface overhaul, guide, webdesign, screenshot, excel sheet… is made by ONE GUY? In pretty much around one month?

“Well, if the players are better, the game will be.” – Mahiko

Oh, did you notice the Captions on some the videos? Those aren’t crappy automatic captions… because of this guy:

randomrequester

Mahiko HAND CODED those subtitles. Yes, he manually typed and timed .SRT files. For who is he doing this?… Yup.


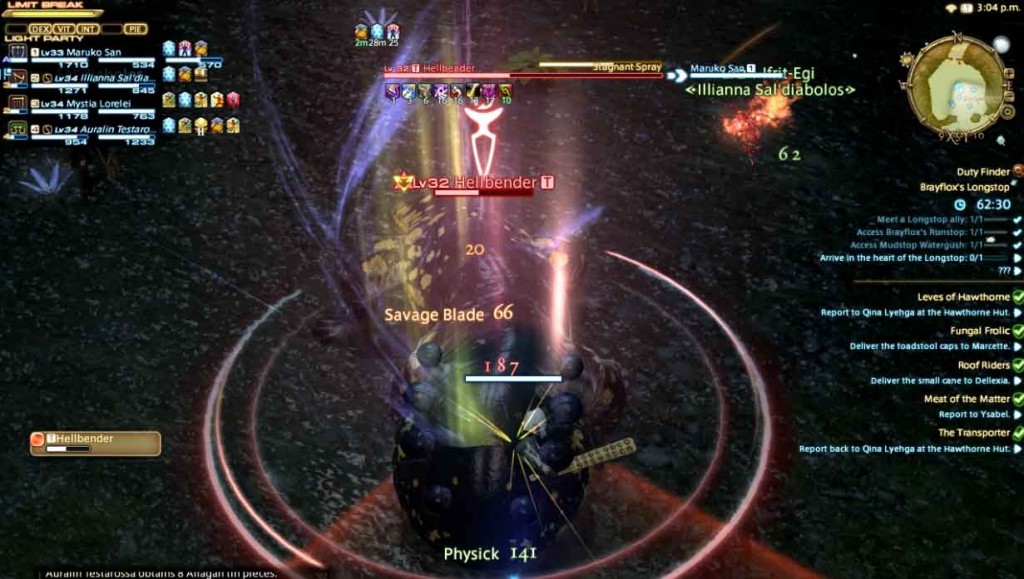
Why are the videos in my (Maruks) perspective?

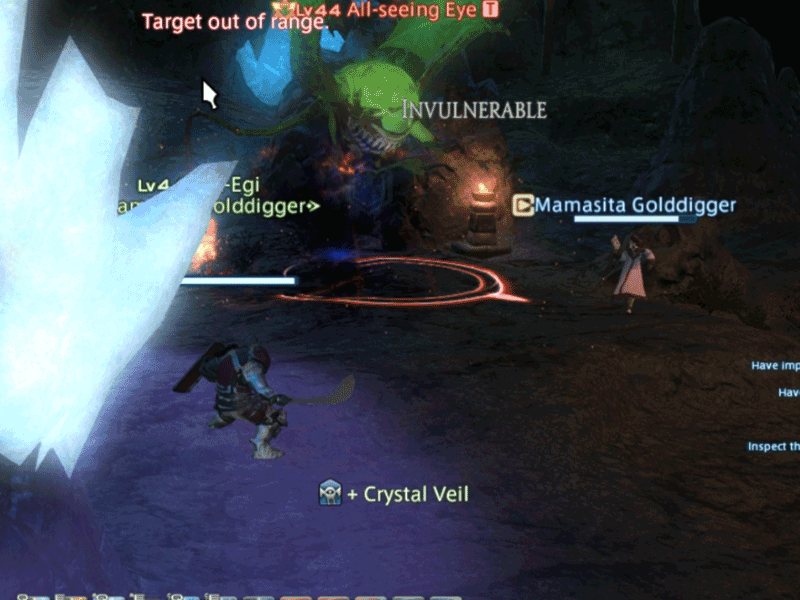
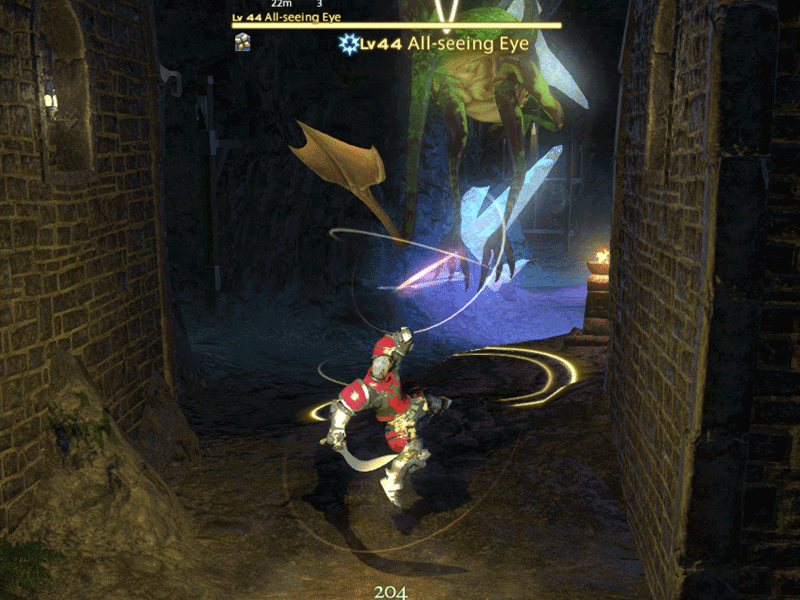
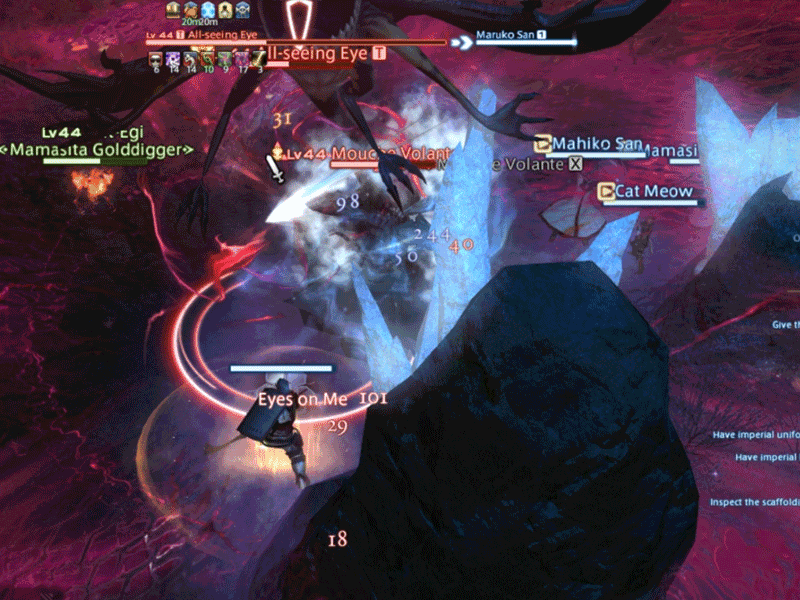
Because his system cannot handle recording. His system barely pushes 40FPS on low. He was happy with that until he found out the community needs/wants video guides to help them out (“Whoa, alot of people need help Garuda?” – Mahiko). Each time he rendered that Garuda video, it took him 40 minutes. Editing was painfully laggy for him, and ended up causing minor fixes which required him to render the file four times… because “It wasn’t up to his standard”.

Being extremely busy myself, I helped my brother out as much as I could, typing up guides with him after work. Recently, someone PM’ed me in game… and said “Thanks for the great guides and video, man!”. Another guy said “Thanks for the tanking tips”. Without thought, I replied – “Welcome.”

has he heard any of this?

I learned yesterday that he ordered some parts to “Not get a significant drop in FPS when I record“, So that he could somehow “Help healers, and give people more POV’s on fights“.

My brother is by no means poor. But as far as I can help it, he ain’t payin for that ****.

Supporters – You’re the best.

Maruko – $??? (Beat me, and I’ll show it!)
Jason D – $20.00
Grzegorz Z – $15.00
Kaolai S – $10.00
Jerry Banks – $10.00
Robert L – $10.00
AA Khalifa – $5.00
Jean Carlo SC – $2.00
William B – $2.00


[updated manually for now, as much as possible]

What to expect with this?

We cant give out rewards now, but we will never forget the people on this list when we can. But here’s what we CAN promise:

  • Cross-cam video guides (Tank/DPS/Heals).
  • MORE videos!
  • Faster production of videos!
  • …maybe streaming!?

And a whole lot of other stretch goals like getting more HUMAN help with the site, STREAMING and server costs! But in essence, it’s to “Get mahiko a better PC to play and record with”. We can assume that he can and WILL continue to provide to the community, which is enough of a reward for me. And honestly he deserved every cent of what I gave him.

If FFXIVGuild or Mahiko has helped you in the past…

No money? It’s okay, he never asked for it. I am. If this site has EVER HELPED YOU IN THE PAST: COMMENT BELOW! – say thanks to the soul of FFXIVGuildMAHIKO! Expect greater things from us in the future!
[Edit: Best brother award goes to Maruks – Mahiko]

Follow us on Facebook for more FFXIV updates!

FFXIV ARR Dzemael Darkhold


Seeking to utilize an existing labyrinth of natural caves, the Ishgardian house of Dzemael began construction on their eponymous Darkhold near the end of the Sith Astral Era, intending it to server as a refuge for those fleeing the flames of the Dravanian Horde. When the house’s digging uncovered an entrance to the void, allowing an army of voidsent into this realm, however, they immediately abandoned their plans and withdrew from the subterrane, sealing it off so that they might contain the otherwordly invaders within. Despite all this, the house is unwilling to relinquish its claim to the caves, and believes that if they can be cleared of the voidsent, they might still be able to see their original plan brought to fruition.

Where is Dzemael Darkhold: Located in Coerthas Central Highlands, South West of Camp Dragonhead, West of First Dicasterial Observatorium of Aetherial and Astrological Phenomena (mouthful huh!)

[howtoget image]

Dzemael Darkhold General Information

[map]

The Dzemael Darkhold has a special mechanic at the early part of the dungeon where you will see an ‘All-seeing Eye’ run through the halls casting an AoE. You can avoid being hit by this in two ways, either stay near glowing crystals which give you a buff called ‘Crystal Veil‘ this significantly reduces the damage of the AoE or simply avoid it by going far away from the Eye. The tricky part here is that he wanders unceasingly even while you are fighting monsters, so be careful!

FFXIV-Guild-Dzemael-Darkhold-crystal-veil

Map Traps: There is one map trap, they are Aether Traps which explode when you are near them

Magitek Terminals: There are several Magitek Terminals that you will come across, you must pass over all of them in a room in order to unlock the next part of the dungeon

FFXIV-Guild-Dzemael-Darkhold-aetheryte-trapFFXIV-Guild-Dzemael-Darkhold-magitek-terminal


Dzemael Darkhold Boss Strategy

All-seeing Eye (Reward: 3 Allagan tombstones of Philosophy)

This is a tricky fight if you do not position yourself well, and of course make sure all of your party members are within the Crystal Veil. More details below.

Special Mechanic (Crystal Veil): Stay near crystals to gain a buff called ‘Crystal Veil‘ this is the only way to damage the All-seeing eye and it will also significantly reduce the damage taken from his PBAoE – Eyes on me. Note that the the energy the crystals give will fade after some time, when this happens move to the next crystal to get the buff again.

The All-seeing Eye also summons adds throughout the fight, so positioning is key to make sure your party does not all get hit with the various AoE skills all of them will do. The first set of adds are easy to get rid of but the second set do a frontal AoE cone… So you can imagine how the tank needs to gather emnity for the All-seeing Eye and the adds to make sure their cast effects are targetted to a direction away from the party

  • Eyes on me (no cast huge PBAoE): Simply put, it deals very significant damage if you are not near any crystals under the buff ‘Crystal Veil
  • Cursed Gaze (fontal AoE cone): Gives Amnesia or Paralysis

FFXIV-Guild-Dzemael-Darkhold-all-seeing-eyeFFXIV-Guild-Dzemael-Darkhold-all-seeing-eye-fight

Taulurd (Reward: 7 Allagan tombstones of Philosophy)

We like to simply call him… Turd! lol He summons adds that stay on top of a platform, they throw rocks at you, some can be avoided and some cannot, make sure you avoid the ones that can be! (they will have ground AoE cast circles) oh, and also, dont lump up together!

  • Double Smash (frontal cone AoE): Position away from Taulurd to avoid this attack
  • Elbon Drop (frontal cone AoE): Stronger than the Double Smash, Turd starts doing this once you get past 50% life

FFXIV-Guild-Dzemael-Darkhold-taulard

Batraal

Batman ugh Batraal is a huge demon bat with two swords, he has a frontal line attack (Desolation) that can instantly KO anyone caught in the attack, so watch out for it! He will also link himself to crystals at several parts of the fight which makes him invulnerable, you will have to destroy the crystals he attuned to, in order to proceed. Watch out though, the crystals do an AoE every now and then so stay away whenever it casts the AoE.

  • Grim Fate (no cast frontal AoE): Batraal does a flurry with his swords and damages all party members in front of him, so make sure you position Batraal away from the party if you are a tank
  • He also does a Random Projectile to party members dealing about 25% of their life
  • Desolation (frontal line attack): This is the attack that WILL kill you if you do not avoid it.

Critical Life: at about 30% life Batraal gets stronger, starts casting Desolation at will and spawns some void like pools that deal AoE damage when stepped on. So position yourselves accordingly


FFXIV-Guild-Dzemael-Darkhold-batraal-voidFFXIV-Guild-Dzemael-Darkhold-batraal-aetheryte

Follow us on Facebook for more FFXIV updates!

FFXIV ARR The Stone Vigil


One of four watchtowers built along the Sea of Clouds by the city-state of Ishgard, the Stone Vigil was overrun and occupied by the Dravanian Horde not long after the Calamity. The following years have seen the knights of House Durendaire make several attempts at reclaiming the fortress, but to no avail. What could it be that thwarts their every effort?

Where is The Stone Vigil: Located in Coerthas Central Highlands, West of Camp Dragonhead, North West from Whitebrin Fort

The Stone Vigil General Information

Stone Vigil is a classic fortress map / instance where your team works their way to the end of the castle fighting enemies and bosses. Since Stone Vigil has been overrun by Dragons you will notice the barriers are made up of flames. Obviously most of the enemies inside are dragons also. There are traps in the form of random dragons popping up and breathing fire to your party and ice sprites that will pop up in some areas in the dungeon. There are also roaming enemies which you have to watch out for!

[map]

Dravanian Outflyer: These dragons swoop down in random areas of Stone Vigil as a map trap, they spit fire in front of them dealing fire damage. Make sure that you remember where they drop down so that you do not fight midst their fire breath.

FFXIV-ARR-The-Stone-Vigil-dravanian-outflyer

Dragon Aevis: Just like the Manor Maidservants in Haukke Manor, these Dragon Aevis’s are roaming enemies, make sure to tag them separately from the other enemies in the dungeon or else you’re in for a party!

FFXIV-ARR-The-Stone-Vigil-dragon-aevis

Ice Sprite: In some parts of Stone Vigil, where the area is open to the outside breeze, Ice Elementals will pop up in groups of four. They are easy to beat on their own, but make sure you dont get caught fighting them while a patrolling Dragon Aevis hops in.

FFXIV-ARR-The-Stone-Vigil-ice-sprite


The Stone Vigil Boss Strategy

Chudo-Yudo

Chudo-Yudo only has two skills, but they hit hard and they are AoE skills so make sure you stay clear from him. His main mechanic is running around the map casting Swinge, so just make sure the party positions themselves accordingly.

  • Lion’s Breath (frontal cone fire attack): Make sure your tank faces away from the party, and also note that if your tank acts fast they can avoid this attack
  • Swinge (large frontal AoE cone): Chudo-Yudo moves to a spot on the map and casts Swinge, there is no AoE marking on the ground so try to stay behind him when he casts this. This skill also inflicts status ailments (Silence and Pacification for about 3 seconds)

FFXIV-ARR-The-Stone-Vigil-chudo-yudo

Koshchei

This is a fun fight! Reason being you have to control 3 cannons in Koshchei’s lair because a dragon will pop up to help Koshchei out and this will signal your party to interact with the cannon to kill the other Dragon. Koshchei also summons whirlwinds which deal huge DoT damage if you stay inside it (they are slow and easily avoidable) but he casts multiple whirlwinds as the fight goes on so positioning is key. If you have a ranged DPS they should position themselves near the cannon to be able to interact right away. The tank should face Koshchei away from the rest of the party (We place him near the entrance of the room).

FFXIV-ARR-The-Stone-Vigil-koshchei

Isgebind – Final Boss

This guy is the second main boss dragon you will fight in the series of dungeons, he is an ice dragon and casts some nasty AoE attacks! His main mechanic is to fly into the air multiple times throughout the fight, swoops down to do an ice breath attack and then lands to continue fighting you. At about 50% life when he takes to the sky Isgebind casts targetted AoE projectiles to all of the party (make sure to avoid this) in addition to swooping down to do an ice breath. The fight is about positioning and making sure you dodge his AoE attacks.

FFXIV-ARR-The-Stone-Vigil-isgebind

Follow us on Facebook for more FFXIV updates!

FFXIV ARR Cutters Cry


Near an old mountain path once used by Sixth Astral Era woodcutters as a detour through the more perilous stretches of northern Thanalan, lies a cave sought out only by the ignorant or the foolish. Upon first glance, the shade of its maw might appear inviting to one who seeks to escape the punishing rays of the midday sun. However, any good woodcutter knows to keep his distance, for it is said all who enter, never return-the cries of the damned echoing up from the depths the only testament to their folly. Heed this dire warning, and you may live. Ignore it, and soon it shall be your screams that add to the cacophony.

Where is Cutter’s Cry: Located in Central Thanalan, West of Black Brush Station

Cutter’s Cry General Information

This is the first dungeon where the map has traps in them, it’s a theme you will continue to see in various forms in the dungeons to come. Boss mechanics are pretty straightforward and the final boss is actually fun to play (I know we enjoyed learning the mechanics of the fight!)

Traps – There are several Quicksand and Exploding Pillar traps riddled across the dungeon. Be careful not to step on them during fights because they deal a good amount of damage and when fighting a group of enemies could deal enough damage to throw your healer off.

FFXIV-ARR-Cutters-Cry-aether-trapFFXIV-ARR-Cutters-Cry-sand-trap

Bombs – The bombs in this dungeon should be dealt with carefully, their explosion will kill you if you are caught in the casting radius.

Cactuar (Saboteur Desertor) – This guy casts the traditional 1000 needles, something to note is the damage is shared to all party members who are caught in the cast circle. This ability can also be disrupted by stunning the Cactuar.

FFXIV-ARR-Cutters-Cry-cactuar


Cutter’s Cry Boss Strategy

Myrmidon Princess

The first boss of Cutter’s Cry is Myrmidon Princess, her mechanic is simple – she spawns minions to aid her when she falls below 50% life. As a Tank, make sure you get as much emnity from the adds with priority of tanking Myrmidon Princess, keep her facing away from the party because she has one cone attack skill that deals big damage if you are hit with it.

Skills

  • Mandible Bite (Frontal Cone) – as a tank keep the Princess facing away from the party
  • Silence – Casts silence at random party members

At 50% life she starts spawning adds:

  • Myrmidon Marshal – Has Mandible Bite. Defeat this add ASAP because he heals the princess.
  • Myrmidon Guard – Has Mandible Bite
  • Myrmidon Soldier – Weak and easily defeated

FFXIV-ARR-Cutters-Cry-myrmidon-princess

Giant Tunnel Worm

The Giant Tunnel Worm fight is easy if you follow a simple rule, whenever he burrows, stay at the outermost part of the map (ring shaped)

Phase 1

  • Sandstorm (frontal cone) – no cast bar
  • Burrow – Giant Tunnel Worm burrows into the sand and will pop up dealing AoE damage to whoever is in the vicinity
  • Targetted Sand attack to random party members

Phase 2 50% life

  • An additional Burrow attack is added called Bottomless Desert – Giant Tunnel Worm burrows and casts a sand trap that sucks everyone to the center, the closer you are to the center the higher the damage

FFXIV-ARR-Cutters-Cry-giant-tunnel-wormFFXIV-ARR-Cutters-Cry-bottomless-desert

Chimera – Final Boss

We had a fun time playing this boss, he has a numerous skills but if you know how to deal with them, they are easily managed. The Chimera has 3 heads (Left Head is a Dragon, Middle Head is a Lion, Right Head is a Ram). Key thing to remember in this Dungeon, is to watch the color of the Chimera’s eye. There will be a prompt letting the whole party know what color the Eye of the Chimera is. Remember, don’t stay too far or too near the Chimera so you can react according to how it changes its eye color.

  • Eyes turn Blue =Stay Away from Chimera, He will cast a PBAoE (Ram’s Voice)
  • Eyes turn Violet = Stay Beside Chimera, He will cast an AoE attack and damage party members who are too far away from it
  • Eyes focus on a Single Target = Don’t panic he will cast a ball which will follow his target and explode, this is a DEMI attack halving the life of anyone caught in the exploding radius, if you are the target try to get the ball away from the rest of the party and move out to let it explode.

Skills

  • Dragons Breath – the dragon head casts a cone attack on the left area of the Chimera dealing ice damage
  • Lions Breath – the lion head does frontal cone AoE dealing fire damage
  • Rams Breath – the ram head casts a cone attack on the right area of Chimera dealing ice damage
  • The Ram’s Voice – PBAoE which should be avoided by your party members. It’s ok for the Tank to try and avoid also if they can.

FFXIV-ARR-Cutters-Cry-chimera-blueFFXIV-ARR-Cutters-Cry-chimera-violetFFXIV-ARR-Cutters-Cry-chimera-single-target

Follow us on Facebook for more FFXIV updates!

FFXIV ARR Ifrit – Lord of the Inferno

Ifrit is the first legitimate boss you’re going to fight. Don’t let nostalgia get to you: Ifrit can catch you off guard!

Ifirt Phase 1

“Flame Breath”: A wide cone of fire without a warning area. It’s important that Ifrit never faces the rest of the party.

Vulcan Burst: (PBAoE, knockback): A huge AoE knockback. Don’t worry, the fire walls do not damage you. While annoying for casters, this does not do significant damage.

Eruption – A targetted AoE attack that you must run out of the moment you see it. The affected area is pretty big. Damage ranges from 50-75% of your health.

All of the above abilities will continue throughout the fight.


Ifrit Phase 2

Infernal Nail – At 50% Health Ifrit will spawn “Infernal Nail”. This should be killed immediately. After a set amount of time, Ifrit will cast Hellfire. If Infernal Nail is still alive, your party will be KO’d.

Hellfire – Like mentioned above, a sure KO if Infernal Nail is still alive. This still does a huge amount of damage otherwise. There are two ways to deal with this, either a tank cast limit break before it hits, or a healer casts limit break after it lands. Either way is okay.

Radiant Plume – This ability can affect either the outer rim of the ring, or the inner area. It’s quite obvious, because the floor turns to Lava. After a few seconds of casting it explodes. Avoid this, because it can deal critical amount of damage.

Primals:
Ifrit | Titan | Garuda
Follow us on Facebook for more FFXIV updates!

FFXIV ARR Titan – Lord of Crags

Titans fight has 2 phases, and in case you’re wondering: Yes, you can fall off or be pushed off the platform. Titan can, and WILL, use this to his advantage.

Titan Phase 1

Rock buster (frontal cone attack): A basic cone attack that tanks should be pretty familiar with by now. Face this away from your party members.

Tumult (PBAoE) – Titan randomly casts this skill, and hits everyones. Does twice in succession when in Phase 2.

Geocrush (jumping attack AoE,): When Titan jumps in the air, all party members should get as far from the center as possible, while remaining outside of the red pulsing area which surrounds the platform. Party members standing on the red pulsing area, or too close to the center will be KO’d. This deals significant damage, so make sure your HP is not critical.

Landslide (frontal line attack) – Knocks affected players in the AoE back, pushing them off the platform and resulting in a KO.

All of the above abilities will continue throughout the fight.


Titan Phase 2

The addition of double casting Tumult makes this phase quite damage heavy. If your healer gets caught in a Gaol – get him or her out immediately!

Titans Heart – comes out at 50% must be destroyed within a certain amount of time otherwise his Earthen Fury will kill all party members. This is the same mechanic as Ifrits Infernal Nail.

Granite Gaol – Imprisons a random party member. Party members should attack the imprisoned party member to “free” them ASAP. Otherwise they are vulnerable to Titans various AoE attacks.

Weight of the land –  places two random ground AoE circles which should be avoided. The damage isn’t so big, but don’t get hit either way!

Primals:
Ifrit | Titan | Garuda
Follow us on Facebook for more FFXIV updates!

FFXIV ARR The Sunken Temple of Qarn


Under the unforgiving Thanalan sun lie the ruins of an ancient temple half-devoured by the shifting sands of a timeless desert. Though used by ancient Belah’dians as a place to worship the sun goddess Azeyma, the massive underground structure appears to be far older than this Sixth Astral Era civilization. That, however, did not deter Belah’dian sultans from each adding their own chambers to the original construct in a bid to achieve immortality through creation. In the subsequent years since the fall of Belah’dia, many an adventurer has sought to explore the temple’s mysteries and perhaps return with the treasure of a lost era…only to fall victim to one of the complex traps set to prevent that very thing from happening

Where is Sunken Temple of Qarn located? Located in Southern Thanalan, east of Little Ala Mhigo.

Sunken Temple of Qarn General Information

Things start getting interesting from here on! Qarn is actually a very small map but the boss mechanics can be tricky for first timers. This is the first dungeon where you have to interact with the items on the map to succeed. There is also a lot of treasure in this dungeon, some will be easily missed

Qarn Facer – there will be a block of concrete with a face that shows up multiple times in the dungeon and runs away before you can kill it. This guy holds a coffer and drops it if you kill it before you reach the final boss. Make sure you do as much damage as you can each time he appears.

FFXIV-ARR-The-Sunken-Temple-of-Qarn-qarn-facer

Stone Relics – there are 4 Stone Relics you should pick up in the temple, they will be your key to the treasure later on. The Helm of Might, The Gem of Affluence, The Flame of Magic, and The Fruit of Knowledge.

FFXIV-ARR-The-Sunken-Temple-of-Qarn-stone-relic

Avoirdupois – some more stone faces show up continually in the dungeon, you must kill them on top of the glowing stones as showed in the picture below in order to open doors.

FFXIV-ARR-The-Sunken-Temple-of-Qarn-

Stone Pedestals – you will notice stone pedestals where you can place the Stone Relics you picked up earlier, these pedestals are marked with the stone you should place, if you put in the wrong stone, mobs will spawn before the door opens. (it is unsure if placing the wrong stone will affect the quality of loot you receive)

FFXIV-ARR-The-Sunken-Temple-of-Qarn-stone-pedestal

The Scales of Judgement – before you enter the last boss, you will find scales wherein you can place some of the Stone Relics you picked up earlier, if you explored the dungeon well enough you would have seen a similar pattern shown at the start of the dungeon. The two stones are the Flame of Magic on the left and Fruit of Knowledge on the right (scales of Ul’dah anyone?)

FFXIV-ARR-The-Sunken-Temple-of-Qarn-scales-of-judgement


Sunken Temple of Qarn Bosses

First Boss: Teratotaur Strategy

Teratotaur has a nice mechanic, he has an uncurable Doom spell which he randomly casts once he is below 50% life. (TIP: this can be countered by any action which grants Pacification). His adds also have an attack which deals fatal damage (Final Sting) so make sure to kill them as soon as possible while the tank keeps Taratotaur busy.

  • Frightful Roar (PBAoE): Causes Physical Vulnerability for those caught in the AoE, this can be stunned.
  • Mow (cone attack): Poison damage, can also be disrupted through stun.
  • Mortal Flay (doom): Once caught, the only way to dispel the doom effect is to step on one of the glowing stones.

FFXIV-ARR-The-Sunken-Temple-of-Qarn-teratotaurFFXIV-ARR-The-Sunken-Temple-of-Qarn-teratotaur-doom

Second Boss: Temple Guardian Strategy

We like to call him mini Titan, before you can damage the Temple Guardian you must first destroy the Golem Soulstone, which will incapacitate him and give you time to deal damage to him. From experience you have to go through this cycle 4 times until he is defeated. The tricky part about this boss is that even though your tank has emnity he can still do his skills at will to any party member so watch out! Tank tip: keep him as far away as possible from the rest of the party!

  • Boulder Clap (Cone frontal AoE): The Guardian claps his hands violently in front of him
  • Rockslide (Frontal Line Attack): Shakes the earth in front of the Guardian which damages all players in front of it
  • Random Stun: The Guardian dashes at a random party member, knocks them back and stuns them for a duration of about 3 seconds
  • Obliterate (map wide AoE): The Guardian jumps and lands dealing AoE damage to the whole party

FFXIV-ARR-The-Sunken-Temple-of-Qarn-temple-guardianFFXIV-ARR-The-Sunken-Temple-of-Qarn-temple-guardian-open-hard

Final Boss: Adjucator Straegy

Watch our video on how to beat Adjucator here:

Adjucator has 4 phases, each phase increases in difficulty and mechanics.

First Phase (Full life)

  • Darkness (frontal cone): Does big damage, but can be disrupted with well timed stuns.
  • Sun Juror (Adds): Must be killed on top of a glowing block otherwise they will come back to life, just like the Avoirdupois earlier

Second Phase (75% life)

  • Mithril Verge: Adjucator spawns beacons of light which shoot out lasers at random party members. These Verge’s can be killed and avoided easily but if you get hit they deal big damage.
  • Paralyze (random): Paralyzes one target randomly

Third Phase (50% life)

  • Creeping darkness: Map wide AoE which he does at random until he dies
  • Mithril Verge (bomb type): Verge’s will now pop up and will be encased in a box of light, after a few seconds the light becomes a wall which you cannot enter, make sure the nearest party member enters the light to destroy the verge otherwise the verge will explode and deal huge map wide AoE damage

Final Phase (25% life)

  • Mithril Verge (multiple spawn): 4 Verge’s will spawn across the room targetting random party members intertwining their lasers (yes, you can potentially be hit by more than 1 laser so watch out!). Key is just to kill the verge’s immediately and avoid the lasers while doing so, this is a fun test of position for your tank.

FFXIV-ARR-The-Sunken-Temple-of-Qarn-adjudicatorFFXIV-ARR-The-Sunken-Temple-of-Qarn-adjudicator-mithril-verge

Follow us on Facebook for more FFXIV updates!

FFXIV ARR Grand Company Guide

Each city-state in Eorzea has a Grand Company, they were initially formed to combat the Garlaen empire during the 6th Umbral era to prevent the great tragedy and now stand as protectors of their people. All Grand companies have their respective leaders leaders whose job is to ensure the interests of the citizens of the city-states they represent are kept in tact.

What is a Grand Company?

The Grand Companies are military and technological factions of each respective city-state that they represent. They we’re created. See the official website for more information: http://lodestone.finalfantasyxiv.com/pl/company/index.html

What are the Grand Companies?

The Maelstrom
(Limsa Lominsa)
The Immortal Flames
(Ul'dah)
The Order of the Twin Adder
(Gridania)

Where are the locations of the Grand Companies?

  • Gridania – The Order of the Twin Adder – East of Aetheryte Plaza (Adders’ Nest)
  • Ul’dah – The Immortal Flames – East of Ul’dah Aetheryte Plaza (Hall of Flames)
  • Limsa Lominsa – The Maelstrom – East of The Aftcastle ,accessible through Aethernet (Maelstrom Command)

Why should I join a Grand Company

  • The main reason would be, you get your Chocobo through a quest only if you join a Grand Company
  • Grand Company Seals give good items
  • You can purchase an attribute reset item called ‘The Keeper’s Hymn’ for 10,000 GC Seals

How do I join a Grand Company?

Once you reach the 20 story quest you will be asked to choose between the Grand Companies. Quest name: The Company You Keep (GC Name). There will be 3 NPC’s which will allow you to choose which GC you want to be a part of.


What are Grand Company Seals and what can I use Grand Company Seals for?

Grand Companies offer many goods in exchange for company seals. Some of these items include the Chocobo license (your own personal chocobo), Chocobo barding, Equipment, Weapons, Survival/engineering manuals, and more! Seals given by your Grand Company cannot be used in other GC’s

How do I earn Grand Company Seals?

There are many ways to earn company seals such as completing company quests, or caravan escorting (repeatable mini-quests). One of the NPCs at your Grand Company’s counter offers company seals for specific items, materials, and equipment (obtained in dungeons). Joining F.A.T.E.’s will also award you GC Seals and this is a very fast way to get them.

What is the purpose of getting promoted in a Grand Company

Receiving promotions advances your rank in the Grand Company (much like the military). Advancing through the ranks expands the amount and quality of goods that can be purchased with company seals at your Grand Company. Gaining higher ranks also unlocks additional quests from your Grand Company.

How do I get promoted in a Grand Company

The first step in receiving a promotion is to speak with the quest-issuing NPC at your Grand Company and choose “Promotion”. Upon doing so, the NPC will require you to pay a fee in GC seals for your new rank. In addition to paying, you must have completed a specific Grand Company quest to advance to your new rank.

Can I be part of more than one Grand Company

Not simultaneously but you can switch freely, still unknown if you lose your rank and GC seals

What is the Political setup of the Grand Companies?

The MaelstromThe Immortal FlamesThe Order of The Twin Adder
Follow us on Facebook for more FFXIV updates!

FFXIV ARR Brayflox’s Longstop Dungeon Guide


After a tiring journey across Eorzea, it is deep within the quiet jungles of Raincatcher Gully where the charismatic and enteprising young goblin, Brayflox Alltalks, chooses to build his tiny empire. What he does not realize, however, is that something else – something sinister – has also made the lush forest its home. Now driven from their rightful(?) claim, Brayflox and his brethren seek to retake the land, and are not above asking the help of lesser races (that would be you) to help them do so.

Where is Brayflox’s Longstop located? Located in Eastern La Noscea, near Wineport.

FFXIV-ARR-Brayflox-Longstop-how-to

Brayflox’s Longstop General Information

Brayflox’s longstop has many optional treasure chests. Most notable is the “goblin” sidequests. The map layout is not very straight-forward, and many packs of mobs can be skipped. There are four bosses in Braflox’s Longstop:

Bosses: Great Yellow Pelican | Inferno Drake | Hellbender
Final Boss: Aiatar

Goblin Sidequest

Brayflox’s Longstop has a unique Goblin Sidequest. You will pass a Goblin village where you can choose to save Goblins that are being attacked by Dragons (your efforts will be greatly rewarded, because every time you save a Goblin they will give you a treasure coffer). In the map we have marked all the locations.


Brayflox’s Longstop Boss Strategy

Great Yellow Pelican Strategy

There is only one thing you should note about this boss. A bunch of Adds spawn from the gate. A pretty basic fight that tests the fundamental skills of your group. The tank must pick up the adds, and DPS slow/stun/ kill them. The adds  must not reach the healer – he or she will die in seconds.

FFXIV-ARR-Brayflox-Longstop-great-yellow-pelican

Inferno Drake Strategy

Inferno Drake has a cone attack that should be avoided. The tank must position the drake away from the other party members so they do not get caught in the target of his cone. There is an add phase where Brayflox will be chased by a dragon, make sure you kill the add before proceeding to kill Inferno Drake. Other that that the drake is a straightforward fight, and like all mobs in this dungeon he hits hard!

TIP: Inferno Drake can be put to sleep, handy when dealing with the add that pops up in the fight

FFXIV-ARR-Brayflox-Longstop-inferno-drake

Hellbender Strategy

Hellbender only has one significant skill to look out for:

Queer Bubble – Encases one of your party members in a bubble, making them unable to use skills. This bubble must be destroyed ASAP.

Other than that, his other skills can either be avoided or disrupted (stun). As a tank, make sure you position Hellbender to face away from the rest of your party.

FFXIV-ARR-Brayflox-Longstop-hellbender

Aiatar Strategy

If you have low-level white gear, and are only level 32, this guy can be a problem. Aiatar has three abilities to watch out for:

  • “Frontal Line Breath” – This is a hard hitting skill that damages all targets in a line. While the AoE isn’t huge, the time given to dodge it is very small. If you haven’t bound strafe on your keyboard – now is the time.
  • Poison Spit – Targets a random party member and shoots a poison ball at it. Because of this skill it’s highly recommended that the party spread a bit. The ball poisons and damages it’s target, and leaves a pool of poison on the ground.
  • Poison Pool – As long as Aiatar remains standing on a poison pool, Aiatar will regenerate HP very quickly. Your first priority is to have your tank drag him out of there.
  • Tanky Tip: Be quick on your feet! Get Aiatar off the poison ASAP! Strafe sideways out of the breath attack! You can also disrupt the breath attack by stunning him
  • Healer Help: Clear poison from the tank. It’s often worth the mana – especially if it ever goes above 2 stacks. CNJ/WHM has a harder time on this fight due to mana issues.
  • DPS Do’s: This fight has a lot of tank movement around – and they can’t generate much aggro. If you’re about to pull the boss – STOP DPS.


Bosses: Great Yellow Pelican | Inferno Drake | Hellbender
Final Boss: Aiatar
Follow us on Facebook for more FFXIV updates!

FFXIV ARR Haukke Manor Dungeon Guide

Once used by seedseers as a place for spiritual reflection and meditation, Haukke Manor was long frowned upon by the people of Gridania as a symbol of excess. After years of protest, the building was finally sold to a wealthy duskwight by the name of Lady Amandine.

While little is known of the Lady, it was said that she was exceptionally vain, and that to maintain her impeccable beauty, she would spare no expense. From facial creams concocted from rare Coerthas honeys to shampoos derived from the milk of exotic phurbles, her daily ritual of beauty treatments escalated until it was rumored she was bathing in the blood of her virgin maidservants. No amount of man-made tinctures, however, could hide the hideous scars she eventually suffered during the Clamity, and from that day forth she was forced to turn to a darker solution, signing away her very soul in a final effort to “save face.”

Haukke Manor Objective

Haukke Manor is a 3 story building. You start on the first level, moving to the cellarage and finally to the 2nd level where you fight the final boss Lady Amandine. Make sure you visit all rooms to get keys so you can unlock the doors to all the treasure coffers. Roaming monsters called Manor Maidservants traverse the halls of the manor and add a flavor to the battle if kept unnoticed, make sure you pull them away from your fight. In this dungeon, your TANK’s skills will show their worth.

Haukke Manor Requirements

  • Party Size: Four
  • Either a disciple of war or magic
  • Level: 29 (Sync from 31)
  • Time Limit: 90mins
  • Must have the level 28 story quest, Skeletons in Her Closet

How to get to Haukke Manor?

Where is Haukke Manor? It’s located in the Central Shroud near the White Wolf Gate of Gridania or Bentbranch Meadows FFXIV-ARR-Haukke-Manor-how-to-get-to-Haukke-Manor

Haukke Manor Map/General Strategy/Tips

FFXIV-ARR-Haukke-Manor-Map 
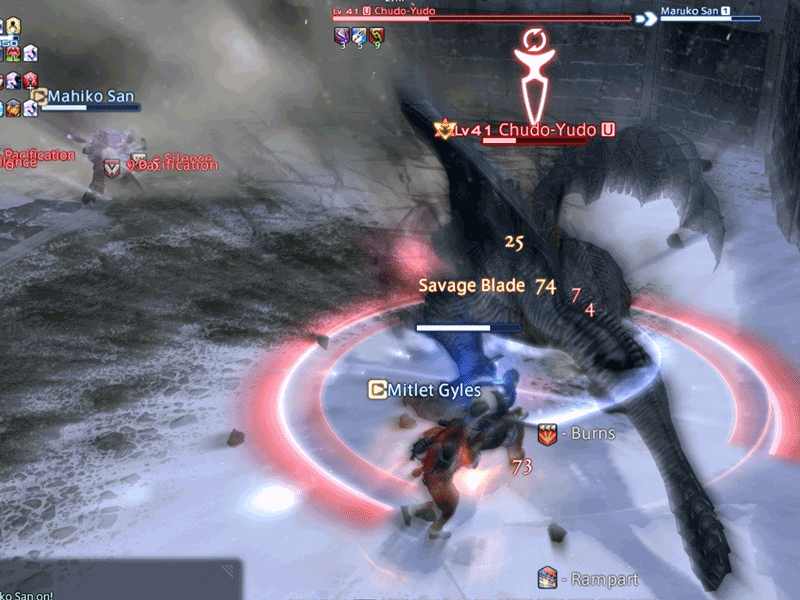
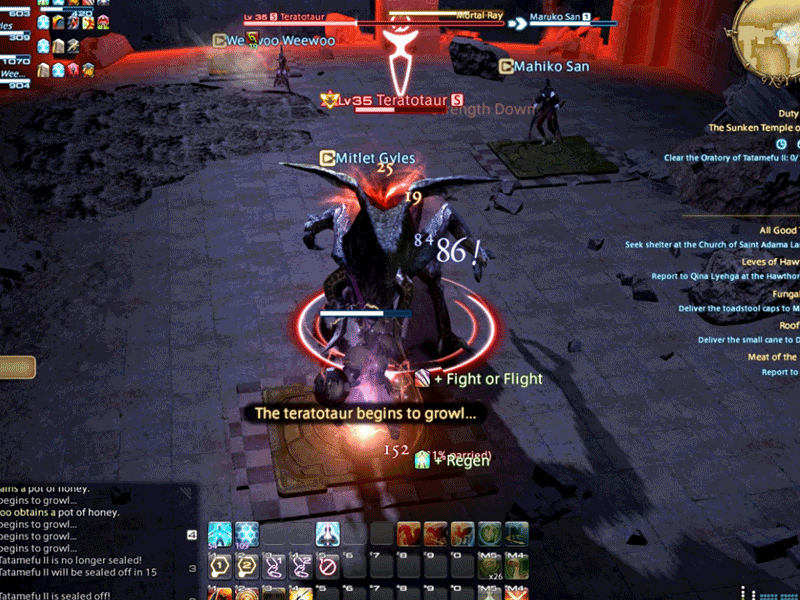
click image to enlarge
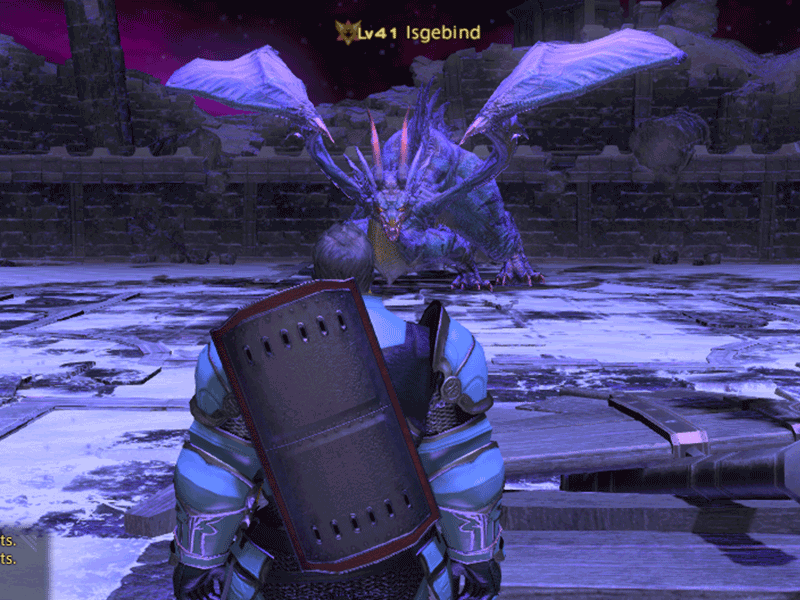
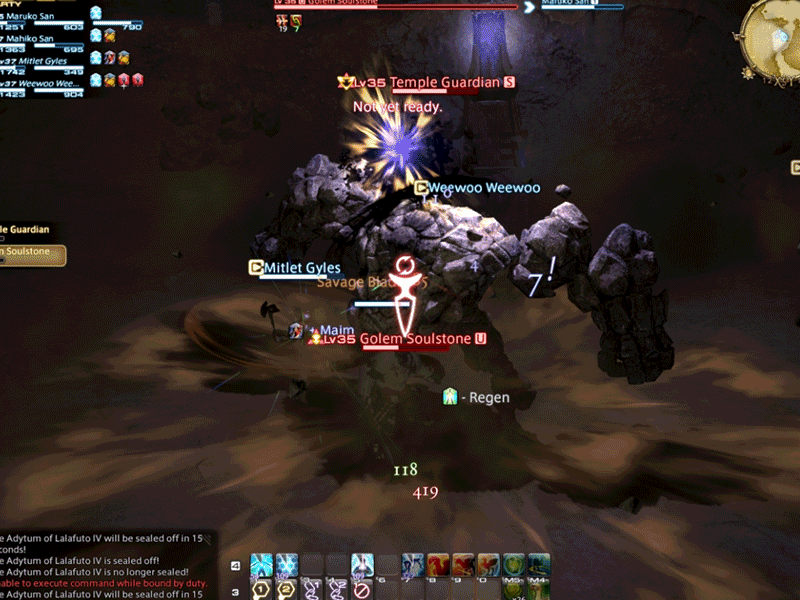
   Patrol Monsters: Throughout the halls of Haukke Manor you will notice patrol monsters that, if given the chance, will join in your fight if you take them for granted. The best strategy is to pull these monsters away from the pack before encountering other monsters. Manor Maidservants: these monsters are annoying to say the least, because they join in fights and they cast PBAoE spells that deal significant damage. The key is to either lure these Maidservants to encounter them first before taking care of the other monsters. FFXIV-ARR-Haukke-Manor-Manor-Maidservant


Haukke Manor Boss Strategy

Manor Claviger

The Manor Claviger has a few tricks up her sleeve but nothing to worry too much about, all the party needs to do is make sure the TANK keeps enmity while party members face her back to avoid the cleave attack, make sure everyone coordinates their stuns for her Dark Mist skill.

  • Cleave (cone based Cleave attack): the Manor Claviger has an ability which she uses at will, it is targeted to whoever has her enmity. It’s best to keep the party facing her back while the TANK stays up in front to minimize damage of the team. Her sword then turns
  • Dark Mist (PBAoE): This ability is disruptable by stunning the Claviger, if left to cast, it will deal significant AoE damage, if you cannot stun the Claviger while she is casting this, or are unsure if one of your party members can, move away from the cast circle.
  • Void Fire II (Targetted AoE): We noticed the Claviger casts her Void Fire to party members who are fighting her from a distance, she will cast

FFXIV-ARR-Haukke-Manor-Manor-Claviger-Void-Fire FFXIV-ARR-Haukke-Manor-Manor-Claviger-Cleave

Manor Jester and Manor Steward

This can be a difficult fight if the party keeps changing targets… We usually attend to the Manor Jester first, while ensuring the TANK keeps enmity of both the Jester and the Steward. The Manor Steward casts a Soul Drain (PBAoE), but nothing that a coordinated disruption by stunning him cant handle. The TANK is the star of the fight in this battle.

  • Manor Jester: Ranged attacker with Ice based abilities
  • Manor Steward: Melee attacker
    • Soul Drain (PBAoE): Much like the Dark Mist of the Claviger, the Steward casts Soul Drain at random intervals but easily avoided with a coordinated stun. Again, if you are not sure that your party can stun the Steward, get out of that casting circle!

FFXIV-ARR-Haukke-Manor-Manor-Jester-Steward

Lady Amandine

The overall strategy to defeat Lady Amandine is to ensure that each player executes their role the way they should. TANK and HEALER keeps emnity of Lady Amandine and any ADDS, while the DPS extinguishes lamps and defeats ADDS. All party members should be alert for casting circles and stay away from them. The most important skill to stun is the Dark Mist. All other details of the fight are below:

  • Void Lamps: Lady Amandine lights up lamps located at the four corners of her chamber, if you leave them unnoticed they will deal AoE damage (Void Fire) every 10 seconds or so. It’s important to interact and disable the Lamps before the AoE damage overwhelms your HEALER. The TANK should keep the emnity of Lady Amandine.
  • Dark Mist (PBAoE): Just like the Manor Maidservant, the Lady has an AoE that can be disrupted by stunning her, if you let her cast this at the wrong time this it is an easy wipe. Stay away from the casting circle if you cannot stun or you feel no one in your party will be able to!
  • Void Fire II (Targetted AoE): Much like the Manor Claviger, Lady Amandine casts Void Fire AoE, the fight will be a lot easier if the party stays away from its casting circle
  • Lady’s Candle (Bombs): At random times in the encounter Lady Amandine will summon bombs, be careful of these bombs, when they explode and you are within the explosion radius, they can kill you and your party members, make sure to stay clear from their exploding raduis!
  • Last Hurrah! (AD wave): The lady is a tough one, and when she reaches about 25% of life she will summon ADS that need to be disposed of or else the healer will not be able to cope up. There are two ways to handle this, fastest way is to save up your limit break for the THM, if your party has one and have them use it at this stage, the other way is to have your DPS make short work of each ADD while the tank keeps emnity on both the Lady and the rest of the ADS. Oh and BTW, these ADS seem to be immune to sleep!

FFXIV-ARR-Haukke-Manor-Amandine-Ads FFXIV-ARR-Haukke-Manor-Amandine

Follow us on Facebook for more FFXIV updates!