FFXIV Four Star (4*) Master Crafting Rotations (& More)

UPDATED! Master Crafting Rotations! How to make HQ token items (Intricate Silver Brocade, Calibrated Rose Gold Cog etc..) and 4* Equipment!

All you need to know about crafting rotations relevant to the FFXIV crafting current end-game (Three Star / Master), and a step behind (Two Star)! If you’re wondering how to gear up to reach this point, check out our Crafting End-game Gear & Materia. Let me preface this little guide with one thing: Everyone might be at different gear points and you can “upgrade” or “downgrade” these rotations to your liking. Please use http://www.ffxivcrafter.com/ to see if it’s up to scratch. That site is great for testing out these crafting rotations! As you get better gear, you can “upgrade” these rotations to increase your chances.

Navigation:
Four-star (4*) Master Crafting Rotation | Tier 2 Token Item Rotation | Tier 2 Token Item NQ Rotation
Three-star Master RotationToken Item Rotation | 2 Star 40 D | 2 Star 80 D | Crafting Food?

Four star Master crafting Rotation (Equipment)

This is for the 4* equipment such as Arachne Bolero, Wootz Sallet, etc… Again, there are a chunkton of rotations possible, the below outlines is a rather generic rotation with the following upsides:

  • All crafters can easily fit the crossclass required INCLUDING the Rumination + Reclaim escape pod.
  • Easily Reclaimable after all touches and Great Strides
  • REQUIRES only 1 ToT, or sacrificing one touch for Comfort Zone in the middle phase.

You need the following NINE crossclass skills:
Comfort Zone, Tricks of the Trade, Byregot’s Blessing, Hasty Touch, Steady Hand II, Piece by Piece, Rapid Synthesis, Ingenuity II and Waste Not II
This means ALL CRAFTERS can use this rotation. Your tenth skill SHOULD be reclaim. Eleventh should be Rumination (all classes should be able to support this)

Stats: 479 MINIMUM CRAFTSMANSHIP, any control above minimum, 395 CP+ToT.

/ac “Tricks of the Trade” <wait.2>
/ac “Inner Quiet” <wait.2>
/ac “Tricks of the Trade” <wait.2>
/ac “Ingenuity II” <wait.2>
/ac “Steady Hand II” <wait.2>
/ac “Piece by Piece” <wait.3>
/ac “Rapid Synthesis” <wait.3>
/ac “Tricks of the Trade” <wait.2>
/ac “Hasty Touch” <wait.3>
/ac “Tricks of the Trade” <wait.2>
/ac “Master’s Mend” <wait.3> (Changing to Manipulation is OKAY to save CP)
/ac “Tricks of the Trade” <wait.2>
/ac “Steady Hand II” <wait.2>
– The above fits into one macro: If you fail any Rapid Synthesis, reclaim at this point

/ac “Waste Not II” <wait.2>
/ac “Hasty Touch” <wait.3>
/ac “Steady Hand II” <wait.2>
/ac “Hasty Touch” <wait.3>
/ac “Tricks of the Trade” <wait.2>
/ac “Steady Hand” <wait.2>
/ac “Tricks of the Trade” <wait.2>
– The above fits into one macro: You NEED to have hit one ToT at this point. Check if you have 71CP at least

Manual Crafting Begins

Great Strides (SH~4)
Bait 1? (SH~3) (39 CP needed to complete) (Bait with Observe if CP>=50)(Innov if CP>=57)
Byregot’s Blessing (SH~2) (Last chance to Rumination/+Reclaim)
Standard Synthesis (SH~1)

For now, this is a good “general” rotation to follow. But, as always, core knowledge of crafting will always beat rotations in crafts as difficult as these (and much worse, the token items). Again, it all depends on melds… preference of safety versus risk…


“Four star token” HQ Rotation

Some feedback on this rotation says it’s too complex – will “fix” somehow.
It also works with all crafters, but not “rumination+reclaim” safe.
Will be redesigning this to find a middle ground.

OKAY, before anything else – there are MANY MANY MANY rotations and MANY variants, with many possible outcomes. ONE THING FOR SURE is that there is NO WAY to 100% HQ these 100% of the time. There is no BEST rotation, only rotations that are better at one thing or another (Maximum security, maximum chances (but high risk) etc etc).

TO PREVENT CONFUSION, these are the items in question:
Intricate Silver Brocade (WVR), Rich Tomato Relish (CUL), Concentrated Spirits of Salt (ALC), Water-Hardened Hippogryph Strap (LTW), Balanced Darksteel Hook (ARM), Reinforced Darksteel Wire (BSM), Calibrated Rose Gold Cog (GSM), Reinforced Sprice Plywood (CRP). We also assume you bothered with HQ base materials for 1494 starting quality. First, a gear check:

If you’re at this point, you probably have stats similar to one of these sets:
“Didn’t bother with some of the new stuff” “But I have to pick up the offhand” (link)
437 Craftsmanship 393 Control, 388 CP with food.

389 CP is actually useful: more on this later. Actually, I recommend it. If you’re looking for a right-side upgrade, I suggest the Mosshorn Earrings (replacing old-timers Red Coral Earring)

Anything lower than this is SUICIDE. These crafts are not for the feint of heart.

Mahiko “Semi-YOLO” Rotation

PHASE 1 (30%~ success rate)
/ac “Comfort Zone” <wait.2>
/ac “Tricks of the Trade” <wait.2>
/ac “Inner Quiet” <wait.2>
/ac “Tricks of the Trade” <wait.2>
/ac “Piece by Piece” <wait.3>
/ac “Tricks of the Trade” <wait.2>
/ac “Ingenuity” <wait.2>
/ac “Tricks of the Trade” <wait.2>
/ac “Steady Hand II” <wait.2>
/ac “Rapid Synthesis” <wait.3>
/ac “Hasty Touch” <wait.3>
/ac “Tricks of the Trade” <wait.2>

Looks shitty? Yeahp, I won’t even lie. If ANY RAPID SYNTH fails, you must reclaim. I start all of my synths in this tier with this macro. Watch it carefully. YOU NEED AT LEAST 1 ToT to be “safe”. So what you’re looking for here is 684+ Progress, and 340 CP. Progress failure is a MUST RECLAIM, Failure to ToT (5 chances!) is okay, but preferable.

Phase 2 A
/ac “Comfort Zone” <wait.2>
/ac “Tricks of the Trade” <wait.2>
/ac “Master’s Mend II” <wait.3>
/ac “Tricks of the Trade” <wait.2>
/ac “Steady Hand II” <wait.2>
/ac “Waste Not II” <wait.2>

Phase 3 (MANUAL CRAFTING COMMENCES)
/ac “Hasty Touch” <wait.3>
/ac “Steady Hand II” <wait.2>
/ac “Hasty Touch” <wait.3>
/ac “Tricks of the Trade” <wait.2>

Yeahp, that’s 9 Hasty touches. The tricks on the end is “free” NOTE THAT the rotation is designed to REPLACE ONE OF THE HASTYS WITH ToT (or more specifically, gain a ToT by the end) If it happens on the end, nice. In the middle – nice. In the middle and end? NICE.

Phase 4 (Dont have 66CP? Reclaim, scrub)

Let’s take this step by step. If i haven’t mentioned already – LESS THAN 66 CP IS A RECLAIM. If you have 389 base CP you have the luxury of ensuring ONE OBSERVE during the BB Baiting phase.

(88 CP? Steady Hand is a filler option, or do it now)(ToT if its up after)
Great Strides (Baiting begins)
Not a good? Careful Synthesis II or ToT. (SH if you haven’t prior) (Observe if >=34 CP) (Innov if 46 >= CP)
Not a good? ToT or (CSII if you haven’t prior). (SH if you haven’t prior) (Observe if >=34 CP)  (Innov if 46 >= CP)
Last chance for Byregots Blessing. Make your decision now. RUMINATION+RECLAIM if you chicken out.
Careful Synthesis II x 2 (If you didn’t use it to bait earilier)

There are times you wont have 88CP for the Steady Hand -> that’s fine. It’s about half as risky as a reclaim at that point. Now, seriously, theres a million deviations to this rotation and a million variables to work to and against your favor. You need to make some decisions for yourself for MAXIMUM VALUE – but there’s always a trade off. These crafts are not for the faint of heart.

“Four star token” NQ Rotation

This rotation is a basic MINIMUM STAT required method to NO QUALITY a “Four star” or “Tier 2” token.

TO PREVENT CONFUSION, these are the items in question:
Intricate Silver Brocade (WVR), Rich Tomato Relish (CUL), Concentrated Spirits of Salt (ALC), Water-Hardened Hippogryph Strap (LTW), Balanced Darksteel Hook (ARM), Reinforced Darksteel Wire (BSM), Calibrated Rose Gold Cog (GSM), Reinforced Sprice Plywood (CRP). 

(also a macro)
/ac “Steady Hand” <wait.2>
/ac “Piece by Piece” <wait.3>
/ac “Ingenuity II” <wait.2>
/ac “Careful Synthesis II” <wait.3>

There are of course many ways to do this. This rotation is only used to get NQ Tier 2 tokens for SUPRA WEAPON UPGRADE. It has pretty much zero use aside from this.

Three Star Master Crafting Rotation

Required Stats:
396 Craftsmanship
374 Control (minimum)
380 CP (345 + HQ Bouillabaisse)
or meld +1 CP on off-hand for NQ.

  • 1) Comfort Zone (Tricks?)
  • 2) Inner Quiet (Tricks?)
  • 3) Steady Hand II
  • 4) Waste Not II
  • 5) Hasty Touch
  • 6) Hasty Touch
  • 7) Hasty Touch
  • 8) Hasty Touch
  • 9) Steady Hand II
  • 10) Hasty Touch
  • 11) Hasty Touch
  • 12) Hasty Touch
  • 13) Hasty Touch
  • 14) Hasty Touch
  • 15) Manipulation (Tricks?)
  • 16) Steady Hand (Tricks?)***
  • 17) Piece by Piece
  • 18) Great Strides
  • 19) Piece by Piece**
  • 20) Ingenuity II
  • 21) Byregot’s Blessing
  • 22) Careful Synthesis II
  • 23) Careful Synthesis II
  • 24) Careful Synthesis II

*** This is what I call the “Byregot’s Killzone“. After pressing Steady Hand, if ever you get a Excellent just jam Byregot’s in. Failing this, after Great Strides, Ignore Innovation or Ingenuity if you land on a Good. Of course, make sure to do Ingenuity 2 before Careful Synths.

** Piece by Piece is a “filler” to try and get a better than normal condition after great strides. Ingenuity II acts the same way. Again, keep in mind the “Byregot’s Killzone”.

Hasty Touch Failures? Out of nine Hasty Touches, I would say the very least I would gamble with is 6 successes. You can consider reclaiming if 3 fail. If 4 fail, you’re gonna need some luck.

1 Tricks of the Trade? Replace step 20 with Innovation.
2 Tricks of the Trade? Replace step 14 with Basic Touch.
3 Tricks of the Trade? Replace step 13 with Basic Touch

Token Item Rotation (Silver Brocade, Gryphonskin Strap etc)

THIS ROTATION DOES NOT WORK FOR TIER 2 (Intricate Silver Brocade, Water Hardened Gryphonskin Strap) For that, please refer to the above (Tier 2 tokens)

Required Stats:
357 craftsmanship
371 CP (345+HQ Pea Soup)
318 Minimum Control (you’ll want more, though)

Note on these stats: For Craftsmanship you need 105 progress on Careful Synth 2, under Ingenuity 2. I get 106 with 357, so it might be lower like 353…) How do you reach 371 CP? I designed this rotation to fit around the popular base CP of 345. as I wrote above, just eat the Pea Soup.

This Rotation is used to craft the following:

  • Spirits of Salt (ALC)
  • Darksteel Wire (ARM)
  • Darksteel Hook (BSM)
  • Spruce Plywood (CRP)
  • Spicy Tomato Relish (CUL)
  • Rose Gold Gear (GSM)
  • Gryphonskin Strap (LTW)
  • Silver Brocade (WVR)

Token Item “Mahiko Token” Rotation:

  • 1) Comfort Zone (Tricks?)
  • 2) Inner Quiet (Tricks?)
  • 3) Steady Hand II
  • 4) Waste Not II
  • 5) Hasty Touch
  • 6) Hasty Touch
  • 7) Hasty Touch
  • 8) Hasty Touch
  • 9) Steady Hand II
  • 10) Hasty Touch
  • 11) Hasty Touch
  • 12) Hasty Touch
  • 13) Hasty Touch
  • 14) Hasty Touch
  • 15) Manipulation (Tricks?)
  • 16) Steady Hand (Tricks?)
  • 17) Hasty Touch***
  • 18) Great Strides
  • 19) Innovation
  • 20) Ingenuity II
  • 21) Byregot’s Blessing
  • 22) Careful Synthesis II
  • 23) Careful Synthesis II
  • 24) Careful Synthesis II
  • 25) Careful Synthesis II

***Byregot’s Killzone. If Excellent, use it. After Great Strides, if material condition good, use it.

Hasty Touch Failures? Out of eleven Hasty Touches, succeeding only 8 times is still okay. Most of the time you’re going to want to use HQ base materials, anyway.

1 Tricks of the Trade? Replace step 17 with Basic Touch
2 Tricks of the Trade? Replace step 14 with Basic Touch.
3 Tricks of the Trade? Replace step 13 with Basic Touch

2 Star 40 Durability Crafting Rotation

This is only relevant in end-game due to the items you need to submit for the Master Recipe Books.

Required Stats:
Craftmanship: 347
CP: 364 (345 Base CP + Stone Soup)

  • Comfort Zone
  • Inner Quiet
  • Steady Hand II
  • Waste Not I
  • Hasty Touch
  • Hasty Touch
  • Hasty Touch
  • Hasty Touch
  • Manipulation
  • Steady Hand II
  • Waste Not I
  • Hasty Touch
  • Hasty Touch
  • Hasty Touch
  • Hasty Touch
  • Steady Hand***
  • Great Strides
  • Ingenuity II
  • Byregot’s Blessing
  • Careful Synthesis II
  • Careful Synthesis II

***Byregot’s Killzone. If Excellent, use it. After Great Strides, if material condition good, use it.

With your Master Weapon, this needs only one Careful Synth II to fill under Ingenuity II (Exact craftsmanship threshold unknown)

2 Star 80 Durability Crafting Rotation

Required Stats:
Craftsmanship: 347
Control: 318 minimum
CP: 345

  • Comfort Zone
  • Inner Quiet
  • Waste Not I
  • Steady Hand II
  • Basic Touch x 5
  • Great Strides
  • Steady Hand
  • Ingenuity I***
  • Standard Touch
  • Great Strides
  • Byregot’s Blessing
  • Careful Synthesis II
  • Careful Synthesis II
  • Careful Synthesis II

***Byregot’s Killzone. If Excellent, use it. After Great Strides, if material condition good, use it.

While there are opportunities for Tricks of the Trade, and subsequent modifications, it’s not really needed. This rotation nails it 100% of the time NQ to HQ.

CP food reference chart

[to be added]

Navigation:
Three-star Master Rotation | Token Item Rotation | 2 Star 40 D | 2 Star 80 D | CP Food?

Related Guides:
Crafting End-game Gear & Materia |

Well good luck with the big boy crafting recipes! Hopefully, you won’t experience your first heartbreak of NQing a Master!

Wanna add something? Hit the comments below!!

Follow us on Facebook for more FFXIV updates!

FFXIV Rafflesia (Turn 6) Strategy Guide

Thorns, bulbs, bees, honey & slugs! Don’t let Turn 6 get you down! Read our Gardeni… err… Rafflesia Guide!

Welcome to our Rafflesia (Turn 6) Guide! Hopefully we can share with you tips we learned to make this fight less stressful for you!

“Inside your eye sockets are things called eyes. I heard they are useful.” – Mahiko San, FFXIVGuild

Navigation:
[Page 1: Phase 1 & 2 ] [ Page 2: Phase 3 ]
P1 Abilities & Strategy | P2 Abilities & Strategy | Imporant Tips & Reminders

A useful link to have open is our: T6 First Kill Video.

Rafflesia Phase 1 (100%-70%)

Phase 1 Rotation
Thorn Whip – Bulbs – Thorn Whip – Devour/Spit – REPEAT.

Bloody Caress – A strong cleave that adds a stack of Vulnerability up on whoever is hit. Acts as a tank swap mechanic, and you should switch at 3~ stacks.

Thorn Whip – Links two or more people together with a visible tether. Targets will take damage as long as the tether is not broken. The “chain” is broken by moving AWAY from whoever you’re tethered to (a set distance).It’s much easier to break tethers if the initial chain is “short”. Meaning, the closer you guys are stacked for Thorn Whip, the easier it is to break (more on this later).

Dark Matter Bulb – Little plants that can spawn in one of eight possible locations (will never spawn in the same place twice in a row). These bulbs will create a continually growing briar patch until it has grown to max size, or killed (it stops growing, but existing briar will not vanish). Briar prevents movement effects, but also has a huge DoT. This is relevant because…

DEVOUR / SPIT – A Yellow marker appears above the target of “Floral Trap”, and this person will shortly be “Devoured”. Devour is a suction, cone AoE. Be careful – even if you are not the target of Devour, if you are BETWEEN the yellow marked guy and Rafflesia, you’re gonna get sucked in. If Rafflesia eats a guy, he gets a PERMANENT DAMAGE UP.

Blighted Bouquet – Haha, figuring this out the first time was pretty funny. If you take any action towards the end of its cast time – you will die. Simple as that!

Phase Notes
Overall this phase is a non-issue, and pretty much a tutorial for the torment to come. Anyone and their mother can get past Phase 1! Refinement of strategy will be discussed in the Tips & Reminders section.


Rafflesia Phase 2 (70%-40%)

Rafflesia Phase 2 Rotation
Bulbs – Thorn Whip – Devour/Spit – Honey – Thorn Whip – Blight – Bulb – Thorn Whip – Devour/Spit – Thorn Whip – Blight -REPEAT

The briar vanished!” – Everyone.

Thornwhip, Dark Matter Bulb, Devour/Spit and Blighted Bouquet still make an appearance here. In phase 2, though, it is UNSAFE to use old briars to prevent devour. You must always dodge towards newly spawned bulbs/briars.

Again, this is important enough to repeat: If you are targeted by Devour – you may only use briars left by the NEWEST set of bulbs (During Phase 2). Now for the next unique ability of this phase…

Honey / Dark Matter Bee – Rafflesia will target one person to be “Honey Glazed”. This person, well, will attract Bees. Bees do NOT have an aggro table, but luckily they do not hit too hard! They will continue to attack the honey glazed person until he or she dies. Some notes:

  • While in Phase 2, if honey glazed target dies, it will be immediately recast to someone else.
  • If a second bee spawns while the first is alive, the first will begin casting Final Sting. (Hint: It’s not good)
  • If a honeyed guy exists when Phase 3 happens, bees will continue to spawn, likely causing a wipe.

Getting rid of Honey is key to phase 2. How? The Honey Glazed target MUST be devoured. You’ve worked very hard to be not devoured, so getting devoured on purpose should be a no brainer.

Rafflesia Tips & Reminders

Thorn Whip is often underestimated. The mechanic is very simple, and will very likely never cause your death directly. It does, however, start certain chains of events that can lead to strain or failure. We gained considerable consistency and stability when we applied one simple rule: Stack up before Thorn Whip. The shorter the whip, the easier it is to break! Everyone takes less chain damage, everyone has more freedom of movement, less accidental devours, less briar damage…so on, so forth. This lasts throughout the WHOLE FIGHT so you might as well get used to it.

Thorn Whip -> Devour: How? Dodging devour is pretty easy if you’re the one who has the mark. What if you’re chained to someone? What if multiple people ran the same way you did? To prevent all this BS, we applied a simple rule: WAIT FOR DEVOUR UNTIL BREAKING CHAINS!! We would all rather take a bit more chain damage than to risk the entire raid.

Honey/Bee Problems? Well, ideally you only want 1 honey but this isnt always possible. If middle bulbs spawn – you can’t dps the boss! So instead we just applied a rule of “ALWAYS TWO BEES” and “STOP DPS IF NEEDED”. This way, we’re not stressed for time.

Phase Transition happened but a honey is still around!? This guy has to die. Have him stand in ACID RAIN.

——————————————————

80% of this fight is getting through Phase 2 in a “salvageable” state. 20% is the Phase transition, because Phase 3 is actually easier. More on that in Page 2 of this guide!

Follow us on Facebook for more FFXIV updates!

Navigation:
[Page 1: Phase 1 & 2 ] [ Page 2: Phase 3 ]
P1 Abilities & Strategy | P2 Abilities & Strategy | Imporant Tips & Reminders

Sahagin Beast Tribe Guide (+Vendor Items)

All you need to know about the Sahagin Beast Tribe Quests! What items you can get, tips on quests and more!

The Sahagin are one of the beast tribes you can gain reputation with in FFXIV:ARR. Their home (and Beastmen Daily questing hub) is located in Western La Noscea, (Coordinates: 16,22). The nearest Aetheryte is Aleport.

You can unlock the Sahagin Beast quests by doing the quest: They Came From the Deep in Limsa Lominsa Upper Decks.

Sahagin Vendor Item List

ItemPriceReputation
Table Salt2Neutral
Cinnamon4Neutral
Garlean Garlic5Neutral
Smooth Butter2Neutral
Sunset Wheat Flour4Neutral
Olive Oil8Neutral
Black Pepper13Neutral
Sun Lemon28Neutral
Night Milk84Neutral
Midland Basic111Neutral
?????????


Like all beastmen, the neutral items support a certain DoH Class. In Sahagins case it’s mostly Culinarian. Here’s some interesting stuff to know about the Sahagin Rewards.. The following items are commonly used “ingots” that were annoying to craft, but couldn’t be bought ready made… not anymore!

  • Table Salt – I mean, c’mon…
  • Smooth Butter
  • Olive Oil

And more Raw Materials that were never buyable from NPC before..

  • Sun Lemon
  • Night Milk
  • Midland Basil

Overall, reduces some hassles for culinarians and is worth getting Sahagin Neutral just for that.

Picture of Sahagin items

While it’s impossible to have our own pics of them at the moment, we can post the official SE pics of the Sahagin mount& Sahagin minion here in the meantime –

ffxiv sahagin mount and minion


Check out the Other Beast Tribes
Amal’jaa | Sylph | Sahagin | Kobold

Follow us on Facebook for more FFXIV updates!

Kobold Beast Tribe Guide (+Vendor Items)

All you need to know about the Kobold Beast Tribe Quests! What items you can get, tips on quests and more!

The Sahagin are one of the beast tribes you can gain reputation with in FFXIV:ARR. Their home (and Beastmen Daily questing hub) is located in Outer La Noscea, (Coordinates: 21,17). The nearest Aetheryte is Camp Overlook.

You can unlock the Kobold Beast quests by doing the quest: Highway Robbery in Limsa Lominsa Upper Decks.

Kobold Vendor Item List

ItemPriceReputation
Quicksilver4Neutral
Beastkind Blood7Neutral
Coral Butterfly18Neutral
Cloves16Neutral
Jellyfish Umbrella24Neutral
Aldgoat Horn238Neutral
Scalekin Blood73Neutral
Bomb Ash82Neutral
Morbol VineNeutral
Blue Landtrap Leaf128Neutral
Vitriol216Neutral
?????????

Like all beastmen, the neutral items support a certain DoH Class. In Kobolds case it’s mostly Alchemist stuff, but these types of materials can be used almost anywhere.


Picture of Kobold items

While it’s impossible to have our own pics of them at the moment, we can post the official SE pics of the Kobold mount& Kobold minion here in the meantime –

ffxiv kobold mount and minion

Check out the Other Beast Tribes
Amal’jaa | Sylph | Sahagin | Kobold

Follow us on Facebook for more FFXIV updates!

FFXIV Good King Moggle Mog (Thornmarch) Extreme Guide

Moogles! Moogles Everywhere! If you’re saying “What killed me?!” – Read on! How to bring the Good King to heel in our Thornmarch EX Guide!

You’ve walked into Thornmarch extreme – then that means you’ve recently said “WTF”. Good King Moggle Mog is a pretty confusing fight, but once you get used to it – It’s a breeze! Use our handy dandy guide not get killed by seemingly random things again!

Navigation:
Page 1: Mechanics & Skills | Page 2: “Weird Stuff”, Phases, Tips & Loot
Main Mechanic | Moogle & King Skills | Tanking & Positioning

Main Mechanic: Life sharing

Killing a moogle causes the next phase to begin. The king is invulnerable to damage, and phase transitioning doubles up as the only method to deal damage to him. Here’s how it works: After one moogle dies, the king “gives” them any lost HP they have – damaging the king and healing everyone else to full (and reviving if killed). This has to be repeated three times before entering the final mini-phase. Having ALL MOOGLES AT LOWEST POSSIBLE LIFE BEFORE KILLING is your main objective. Overall, this is how the fight looks like…

Phase 1 -> Kill 1 Moogle -> Phase 2 -> Kill 1 Moogle -> Phase 3 -> Kill All Moogles -> Kill King (mini-phase).

“Moogle Basic Abilities” and “King Skills” will be active the whole fight. “Weird Stuff” will only appear in P2 and P3. This is all discussed below.

Moogle Basic Abilities

Paladin, Warrior and King Moogles have an aggro table. BLM, WHM, BRD, and Thief Moogles do whatever they want.

Paladin & Warrior – They each give a debuff that, long story short, makes tanking both of these moogles simultaneously impossible. Tanks should pick up one each.

===The following Moogles have no Aggro table===
Black Mage – FLARE can (must) be cancelled by dealing direct damage to the caster. Stun/Silence have no effect. He also does meteor, which places a bunch of AoE circles on the ground (blue). Just dodge meteor. [Always have 1 or 2 DPS assigned to cancel flare]

White Mage – Heals. (Amazing, right?)
Archer – Focuses on a random target and does a few basic attacks.
Thief – Approaches a random target and stabs him or her.
Bard – Periodically gives a short buff to surrounding Moogles. (Least threatening)

These abilities continue during the entire fight. If you’re looking for their “ultimate” abilities, and how to deal with them, that’s found in Page 2.

Delta – A combination attack between the Bard, Thief & Archer creating a triangular area of near-certain death. The damage is affected by the total amount of moogle buff stacks all participating moogles! This will leave you at critical HP in the best case scenario, but will most likely one-shot you. Staying away from the middle is the best defense versus delta, but you can also see it coming thru A) A buff on a moogle called “Pombination” which has 3 moogle faces on it. B) Them talking about “Delta! Delta!” & Moving for no reason.


King Moogle Skills

Cleaving attack that reduces mana (Skill name unsure). So healers watch out for this! Moogle Creation is a generic, but thankfully weak, laser attack.

Moogle Buff – Periodically makes nearby Moogles stronger. This is a soft tank swap effect, since the Paladin or Warrior moogles cannot gain too many stacks. Also, tanks must be aware of their position in relation to certain moogles, which will be discussed in the next section. (Skill name unsure)

1000 Kuponze Swing – A slow clunky double cone effect targetting the person who gets a cross-hair. Shouldn’t be a big deal. This skill comes from the two tanks.

Tanking & Positioning Summary

Positioning is very erratic in this fight, but one things for sure: Tanks must be along the outer ring.

“MT” gets Paladin or Warrior + King, “OT” gets whichever the MT didn’t. Once the moogle buff reaches 3~ OT provokes king until his guy reaches 3~ stacks. Tanks can focus target the opposite moogle so they can easily see when they need to taunt. Tanks must also remember to position away from Archer & Thief Moogles. Swap the King when the current MT’s secondary moogle has high stacks.

DPS adjust accordingly, while avoiding middle if possible.

Healers have no reason to stay away from the edge, and SHOULD NOT BOTH BE TOO CLOSE TO PALADIN MOOGLE (More on this in “weird stuff” section).

Follow us on Facebook for more FFXIV updates!

Navigation:
Page 1: Mechanics & SkillsPage 2: “Weird Stuff”, Phases, Tips & Loot
Main Mechanic | Moogle & King SkillsTanking & Positioning

FFXIV Leviathan Extreme Mode (Whorleater) Guide

Heads or Tails!? Don’t let this fight be 50/50! Learn how to smash Leviathan EX in our Whorleater EXTREME Guide!

ffxiv leviathan whorleater extreme mode ex em banner

So you’ve made it to Leviathan Extreme Mode, eh? This is an extremely fun fight that starts with lame music (but makes it up later)! Let our epic guide help you out beating Whorleater Extreme!

Navigation:
Page 1 – Abilities & Adds | Page 2 – Phases, Tips & Loot
Spinning Dive & Body Slam | Adds | Minor Abilities | Briny Mirror

Leviathan Extreme Mode Abilities

As we mentioned above, discussing Levi EX by phase can be a bit confusing. So instead, understanding his abilities first is more important. These two abilities are the most important in the fight, and you’ll be seeing them often –

ffxiv body slam safe spots leviathan extreme mode

Body Slam, often followed by “Oh Sh*t”

Leviathan emerges from the water, (signaled by a “geyser” animation), and slams the platform with his body, pulling everyone toward that side. If you’re too near him, you take heavy damage – and may fall off the platform resulting in instant KO (when the railings are down). Basically, run to the opposite end to where he spawns. Check this out:

Body Slam Dodging Tips: Look at one side only. If you do not see the geyser – run forward! It only means it’s behind you. Using headphones also helps! If he spawns in A – run to B! If he spawns in B – run to A!

It’s quite easy to dodge, honestly, but panic and or complacency can get the best of us! Just remember in the later phases – this means instant Death. So get used to it quick!

ffxiv levi divebomb spiral dive dodging leviathan extreme mode
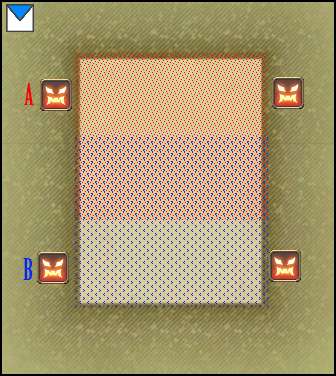
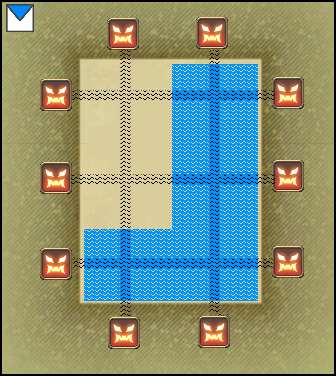
Leviathans “Divebomb” (Spinning Dive)

(See diagram on right) This may be extremely disheartening at first for newer players, but after you get used to it, it’s a piece of cake! This ability is popularly called Divebomb, after Twintanias skill.

The “starting point” of Spinning Dive is, like body slam, marked by a geyser. It will travel all the way across the platform following the lines (the black lines in the diagram). These divebombs are pretty thick. The blue area signifies this. The “Vertical” spinning dives take up exactly 50% of the map, while the “Horizontal” ones take up 33%

To make matters worse, These water balls fall from the sky on random raidmembers before each Spiral Dive. It does significant damage and a slow.

This skill has some quirks, though. If he begins his Divebomb on the North Side (Vertical), the next Divebomb will start from the South (Could be Vertical of Horizontal). Horizontal Divebombs are trickier, though. He will also always begin his dive from the side he was tanked at.

The Horizontal divebombs are a bit messier. Of the three possible horizontal setups, the middle one happens most often. The horizontal divebombs do not seem to follow a strict rule (or they are too rare for me to have observed patterns; please chime in on the comments if you have info)

This skill is often followed by “Oh Sh*t”, excuses or both.


Adds – “The Fat & Thins”

Leviathan spawns two kinds of adds (that fight back). In our FC we call them the Fat, and the Thins.

Thin adds (Wavespine Sahagin)

There are many strategies as to which tank pulls which add. One pulls both is fine, or one each is also fine – really depends on what you guys are used to, and what your composition looks like.

After a certain time – they cast a skill called Hydroshot, leaving a circular AoE on the ground. If stepped on, you get a MASSIVE water DoT! (Is it Esunable? We haven’t got hit by this in a while)

The Fat (Wavetooth Sahagin)

Have a tank pick this one up (Usually the tail tank). If you’re the tank remember this – After the fat casts his 3rd skill, start chain stunning. Kind of like DK’s in T5. This can be hard if you have two warriors.

You see, this guy gets very pissed off after three skills. He casts one of two things, both with extremely unfavorable results. Dreadstorm leaves a circle on the ground, that if stepped on, causes you to run around in fear for 9323478 seconds, and you can step on it again while feared. If the railings are down, this can cause you to walk off. Dreadwash is a medium AoE shout that fears you for roughly 9323478 seconds, If the railings are down, this can cause you to walk off. Yes I copy-pasted that.

This add is often followed by “Oh Sh*t”, then “Where’s the Stun!?”.

As a desperate measure, these things can be stopped by the WHM Fluid Aura or SMN Garuda Push. (Or at least we imagined it to be so, when it happened once; again chime in on comments if confirmed / busted)

Levi Ex Minor Abilities

Majority of the fight, the two tanks split up tanking the Head and Tail. Each end has it’s own abilities.

Leviathan Head Skills

Leviathans head reflects ranged physical damage, and cannot be back attacked – so Magic DPS should target this.

Dread Tide – A line attack that comes from the head. Hits fairly hard, about 3000 damage on a tank. Main tank should position himself away from the raid, especially during adds phases. He usually does this after 3 basic attacks or around every 25 seconds.

Tidal Roar – Raid wide magic damage. Insignificant in the early stages – massive later on. Can be Virused or Dragon Kicked to help reduce it a bit.

Water Spout – An AOE attack originating from both healers. Make sure to split up.

Leviathan Tail Skills

Leviathans tail  reflects magic damage, and is always a flank/back attack – so Melee DPS & Bards should target this.

Scale Darts – A single target attack that comes from the tail. Hits a tank for about 1500 damage.

Tail Swipe – A frontal cone attack that comes from the tail. The damage is shared among all targets hit. Ranged guys make sure to get out of this.

Briny Mirror – look below :)

Briny Mirror – How to deal with it

A Debuff that is applied to whoever has top emnity on the tail of Leviathan when it appears (usually tanks). Briny Mirror is an annoying debuff that applies a stack each time you heal the person who has it. Each stack reduces healing range. Upon reaching 16 stacks – the healer is stunned for a significant time!

You can “cheat” Briny Mirror by doing the following things:

  • WHM Stoneskin doesn’t give stacks.
  • REGEN and its ticks don’t give stacks.
  • EOS/SELENE ignore this mechanic.

So yeah, have your pet near Tail tank, have your WHM seal+regen & SS the guy. You can further make your life easier by using things like Eye for an Eye, Storms Path etc etc…

Stacks are, at times, unavoidable. If you have to get one don’t be too stressed about it. Medica / Succor will likely get you one. But dont sweat it – if you manage your heals well, you’ll never reach the dreaded 16 stacks, or even get close to it. After the Divebomb / Slap phase, make sure you be extra careful in waiting for existing stacks to fall off before you AoE heal again. (Or simply position so you wont hit the guy).

That’s it for Page 1. Understand these mechanics first of all! Page 2 has what we know of Levi’s Phase Transitions.

Follow us on Facebook for more FFXIV updates!

Navigation:
Page 1 – Abilities & Adds | Page 2 – Phases, Tips & Loot
Spinning Dive & Body Slam | Adds Minor Abilities | Briny Mirror

FFXIV Gardening (Seeds / Soil / Crossbreeding)

Found outdated info? Wanna add something? Hit the comments below! Follow us on facebook and Twitter

So you’ve decided to harvest moon it up, huh? Let our FFXIV Gardening guide help you out! Put your science hats on…

Navigation:
Basics | Seeds | Soil | Cross-breeding

FFXIV Gardening Basics

To garden you need two things, FC Housing (or Individual?), and a Gardening Patch. While we can’t help you getting the former, Garden Patches can be found in the housing vendor located in your respective ward.

To plant a seed you need two things. A Seed + Soil. Watering Plants isn’t so bad, and you only need to water them once every human day (estimate). And takes around 3-5 days depending on seed to grow (estimate).

Where do I get Seeds?  Seeds can be farmed by Botanists. There are a bunch, to say the least. (30-40+?)

What about Soil? Soil is obtained by Miners. It comes in three types and three grades. You don’t need specific soil to plant seeds, but full research may be needed if plants are grown on their “home-soil”, though unlikely.

Fertilizer!? You can fertilize a crop to make it grow faster. It can be placed once an hour(human). It speeds it up by an hour growth at minimum (estimate)

What does gardening give!? We don’t know yet, give us a few days to grow our seeds, lol. We will be tracking our Gardening Rewards & Items in P2 of this post.


Seeds – Where and how?

(Node ID is in relation to: Botany Node Locations)

Seeds are a DoL “Rare Drop”, which means it will not always spawn when you inspect a node. There does not seem to be a way to increase the discovery rate of Seeds. You can also get seeds from a Botanist Retainer Venture (which is a pretty decent way to get them)

Where do I find certain seeds? They spawn in any node where you can gather the corresponding fruit. It’s no mystery but we can list them if needed…

Soil – Effects, Properties & Locations

Soil is also a “rare drop”. (See “Seeds” Section). (Node ID is in relation to: Mining Node Locations)

There are three types of soil in the game: Thanalan, La Noscean and Gridanian. Each type of soil has its own unique effects.

Thanalan Soil: Increases cross-breeding chance.
La Noscean Soil: Increases chance for an HQ crop.
Gridanian Soil: Increases crop yields.

Once we harvest a few crops, we’ll know more about the effects.

Crossbreding Seeds?

To be honest, we don’t know much about this yet. There are some question that are still unclear to us…

Crossbreeding is chance based (pretty much confirmed)
Do two seeds have to “grow together”?
Can a seedling Crossbreed with a plant?
Can a plant Crossbreed with a seedling?
Do “tier 2” Crossbreeds exist?
What are the possible rewards for Crossbreeding seeds?

We cannot know any of this without time and luck, so if you know anything – let us know!

Found outdated info? Wanna add something? Hit the comments below!

Follow us on Facebook for more FFXIV updates!

FFXIV Halatali Hard Mode (HM) Guide

Areana? or ZOO? Have a look at our Halatali HM Guide! Includes boss strategy and loot list!

Don’t let goblin-gundams let you down. Let our Brayflox Longstop HM guide show YOU the way!

Basics | (B1)Pyracmon | (B2)Catoblepas | (B3)Narashima & Mumuepo | Halatali HM Loot List

Basics

Halatali Hard mode is unlocked by a quest obtained from Mor Dhona.

There do not seem to be any trash mobs of particular note in this dungeon.

If you’ve completed the Blacksmith Quest line, you’ll meet Bronze Bull as an NPC here (if you remember him. He’s actually still wearing the Cobalt Shamshir you gave him!)

Boss 1 – Pyracmon

You’ll notice a Mammet Activator that’s connected to an Admirer Mammet. When he does 1000-tonze swipe, the floor turns blue (you really cant miss it). During this long channel time, activate the Mammet Activator. The connected Mammet will then release a protective field which you can stand on.

His other abilities 100 tonze swipe – is a short-range circular AoE, sometimes accompanied by a suck, and swing again,

Eye of the Beholder hits all targets far from him. Finally Piercing Glower is a line-aoe.


Boss 2 – Catoblepas

There are 4 Shadowy Orbs near the boss. Activating a Shadowy Orb makes you immune to Catoblepas’s ultimate: Demon Eye.
You can Esuna/Leeches the debuff once demon eye is done casting, since it also reduces your Accuracy.

Every so often a “Tainted Eye” spawns at it’s head. Kill it whenever it appears. It continually gives a map-wide stacking Vulnerability debuff, so you really want to get rid of this fast.

His other abilities aren’t really noteworthy – take care of Demon Eye and Tainted Eye – and you should be good!

Boss 3 – Group Fight + Narashima & Mumuepo

The final encounter(s) of Halatali HM consists of 2 parts. The “Group Fight“, and finally “Narashima & Mumuepo“.

Group Fight

Silent Moss (Conjurer) – He’s the healer so you might as well kill him first.
Langloisert (Lancer) – Has no aggro table and can be an annoyance, kill him second (or third).
U’libho (Archer) – Can be killed second or third, squisy and deals ranged damage.
Franz (Gladiator) – Since he’s the tank kill him last.

There’s not much to note about this fight. Avoid AoE and follow the order above, you’ll be fine.

Narashima & Mumuepo

These two come right after you defeat the group fight. Both of them do the usual AoE that you should avoid. They only have 1 noticeable skill that can cause trouble:

Absolute Bind “chains” two people in your party. They cannot move or act, and it cannot be dispelled. To remove these chains simply interact with the staff that randomly spawns on the ground.

Narashima has a Tailswipe that has quite a big AoE, so you might want to stay at his sides. Killing Mumuepo first is also a good idea.

Halatali HM Loot List

Like most dungeons in this tier, alot of chests drop 2.1 Crafting Materials – stuff like Coke & Peacock Ore.

Halatali also drops an i70 item set (details to follow), and i70 Darklight Accessories.

Found some loot we didn’t? Want something to add? Hit the comments below!

Follow us on Facebook for more FFXIV updates!

FFXIV Zodiac Weapon Guide & FAQ

How to get your ZODIAC WEAPON. Atma Locations, Books, Atma & Animus Stats!

This page is now outdated, please go to our Consolidated Relic Guide.

This looks to be one long and grindy quest to “improve” on our old relic!

How do i Start my Zodiac Weapon Quest!?
The quest starts at Hyrstmill near Fallgourd Float – You need your Zenith Relic first. If you have your zenith, chances are you know who Gerolt is. You must have your Zenith equipped for you to begin the quest…

Navigation (By Step):
1. Fates & Atmas | 2. Upgrading | 3. Animus Weapon | 4. Novus

Zodiac Weapon Step 1 – FATES & Atmas!

Yup, this really sucks, but we need to FATE grind! There are 12 “Atmas” you need to farm, from FATES, in certain maps. These are dropped by ANY FATE IN THAT MAP (chance).

Atma Fate Locations:

AtmaLocation
Atma of the MAIDENCentral Shroud
Atma of the SCORPIONSouthern Thanalan
Atma of the WATER BEARERUpper La Noscea
Atma of the GOATEast Shroud
Atma of the BULLEastern Thanalan
Atma of the RAMMiddle La Noscea
Atma of the TWINSWestern Thanalan
Atma of the LIONOuter La Noscea
Atma of the FISHLower La Noscea
Atma of the ARCHERNorth Shroud
Atma of the SCALESCentral Thanalan
Atma of the CRABWestern La Noscea


Do I have to be my class to get Atmas? NO! But you must be wearing any Zenith. The Atmas you farm can then be used for another class if you wish!

How do I know if I’ve gotten an Atma!? You can’t miss it (see below)

ffxiv zodiac weapon acquisition interface

This page is now outdated, please go to our Consolidated Relic Guide.

Zodiac Weapon Step 2 – Upgrading!

The first person in our guild who got an Atma Weapon is a Bard (Rylai Ariamis), so we’re going to use Artemis Bow Atma as our example.

You can buy 9 books (3-3-2-1 kinds). Each book upgrades a certain stat. Each book costs 1500 tomestones of Mythology (!!).

zenith weapon books

There’s no customization involved here, just different ways to get to the final product. Each book required different stuff for it to “activate”. The interface is pretty cool

ffxiv zodiac weapon upgrade interface

But after that it just sinks in that you’re in for a grind, lol. After all nine books are purchased and “activated”, we assume the next step:

Zodiac Weapon Step 3 – Animus

After upgrading it to maximum, we assume at this point it will “turn in to” your Animus weapon. Here’s a chart of the upgrades from Atma -> Animus.

The total cost would be 13500 Tomestones.

Atma WeaponAnimus Weapon
PLDCurtana AtmaCurtana Animus
Holy Shield AtmaHoly Shield Animus
WARBravura AtmaBravura Animus
WHMThyrus AtmaThyrus Animus
SCHOmnilex AtmaOmnilex Animus
MNKSphairai AtmaSphairai Animus
DRGGae Bolg AtmaGae Bold Animus
SMNWiyu AtmaWiyu Animus
BLMStardust Rod AtmaStardust Rod Animus
BRDArtemis Bow AtmaArtemis Bow Animus

The next step is upgrading your weapon to Novus!

Novus Weapon Upgrading

This page is now outdated, please go to our Consolidated Relic Guide.

After your Animus is complete – the next step is to upgrade it to the Novus Weapon. How is this done? You get a Novus Scroll that you meld materia onto. We have some questions about these scrolls..

  • Are all scrolls the same per class?
  • Are scrolls materia requirements completely random?

Please chime in on the comments!

Navigation (By Step):
1. Fates & Atmas | 2. Upgrading | 3. Animus Weapon | 4. Novus

Follow us on Facebook for more FFXIV updates!

FFXIV Lost City of Amdapor Guide

Diablos doors messing you up, ey? With our Lost City of Amdapor Guide, you won’t get shouted at in DF! Includes boss strategy and loot list!

Whoever said capping Soldiery ain’t easy – didn’t read this Lost City of Amdapor Guide!

Basics | (B1)Decaying Gourmand | (B2)Arioch | (B3)Diablos | Lost City of Amdapor Loot List

Basics

LCOA can be unlocked with the quest that starts in Mor Dhona.

Special Trash Mobs

Mold Colony / Tainted Mold / Hecteyes – this trio can often be found before first boss.

  • Mold Colony Should die first, but Tank should hold aggro on Hecteyes in the meantime.
  • Tainted Mold can be killed with any one attack. The do AoE poison so just let ranged/healer do it.
  • Finally, any Hecteyes Remaining should be killed

Baalzephon – Spawns with a pack of “Dirty Eye” and “White Magestone”. There is often confusion about what to do here..

  • Kill Dirty Eyes first. They do some damage so pile them up and AoE them down.
  • White Magestone should be killed second, since it heals Baalzephon. (These guys do no damage)
  • Baalzephon should be killed when it’s the last thing remaining.

(Special Trash Mob – Mold Colony – spawns in the area before first boss)

Boss 1 – Decaying Gourmand

Affectionately known to us as “Advanced Gobbue”. This guy is pretty basic, but you have a few mechanics to look out for.

Prey – His main mechanic. A link will appear to a random non-tank raid member. After a few seconds the target will be eaten. Simply kill the “Voracious Maw” that spawns shortly after (Kind of like Titans Heart). The consumed party member will take heavy damage, so free them quick! After

He has various skills that give Poison. Just esuna/leeches them away.

Decaying Gourmand also leaves dangerous Pollen on the ground that you should just avoid.

Overall, a pretty easy boss, shouldn’t give you much trouble!


Boss 2 – Arioch

The boss begins quite differently: You cannot target it. There are adds (Ranch Wamoura), when killed give a debuff that “attracts” the boss to you. Which is pretty much the main mechanic of this fight. Ideally, the tank should be the only target of the debuff. Party should just move away before the Ranch Wamoura dies! If you’re not a tank, but the boss

The debuff is called Scale Flakes, and will attract the boss to you for 45 seconds. It has no aggro table, so stuff like provoke will not work. If you’re a non-tank, but attract the boss, it’s not the end of the world. His damage isn’t too big, but make sure to use some defensive abilities. Take note that while Arioch has no target, it will heal quickly.

His abilities aren’t too special or hurt too much. He leaves a growing ground AoE that should be avoided. Aside from that, nothing much.

(Special Trash Mob – Baalzephon – spawns in the area between Arioch and the next boss…)

Boss 3 – Diablos

Ahh, I foresee alot of frustration with PUGs here…

Ruinous Omen – A massive nuke that can be avoided doing the doors correctly.

Diablos Main Mechanic – Diabolical Gate (AKA Doors)
These doors appear right at the start, but wont have any significance till later. There are 4 types of doors

  • Green “Butterfly”
  • Red “Ahriman”
  • Yellow “Lion”
  • Blue “Gobbue”

Opening two of the same kind during Ruinous Omen channel makes your party avoid it!

His other abilities aren’t that noteworthy.

Graviball leaves a sphere on the ground which you should avoid.
Nightmare is a mapwide Sleep.
Ultimate Terror never really came out, we just kept stunning that one… (Will do this for science later)

All his channeled skills can be interrupted (except Ruinous Omen).

Lost City of Amdapor Loot List

Like most dungeons in this tier, alot of chests drop 2.1 Crafting Materials – stuff like Coke & Peacock Ore.

Lost City of Amdapor also drops Darklight Accessories (Neck, Ear, Wrist, Ring)(i7o) for all classes.

Found some loot we didn’t? Want something to add? Hit the comments below!

Follow us on Facebook for more FFXIV updates!