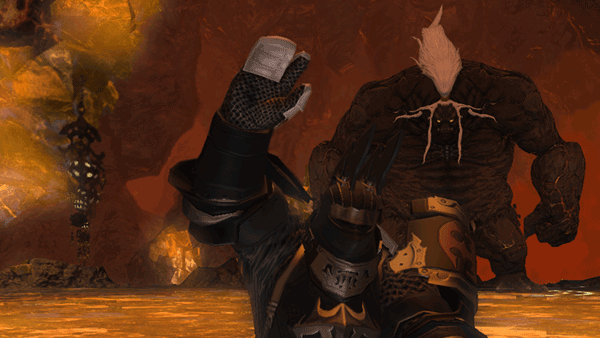
From deep within their mines, the kobolds have watched and waited for another opportunity to summon their Great Father and wreak havoc on Limsa Lominsa. With the destruction of Ultima Weapon, the final obstacle to their plans was removed, allowing the beastmen to summon their god without fear of imperial reprisal. Once more, it falls to you to ensure that the Lord of Crags never sees the light of day.
The first LEGIT Gear check in the game, and if you have lag issues, get ready to die in this fight! We had fun learning how to play Titan and beat him. We will show you two videos below, one is our first defeat of Titan and the second is where we helped a few of our FC members get past him.
Our very first Titan HM Kill:
One important thing to note is, all non-tank players must ideally have more than 3,500 life to survive this fight (specially important in the last phase where he does 6-8 Tumults straight). Lag and slow reaction time also play a major factor in beating Titan, you must be focused, know his rotation and position yourselves carefully in order to win.
Team Compositions:
- PUG: 2 Tanks, 2 Healers, 4 DPS (The type of party you get from duty finder)
- 3 Healers: 1 Tank, 3 Healers, 4 DPS (Safest run, best for lesser geared groups)
- 5 DPS: 1 Tank, 2 Healers, 5 DPS (Ideal for more experienced groups)
- Carry: 1 Tank, 2 Healers, 3-4 DPS, 1-2 Carry (when we want to get a guild member through)
Abilities
In hard mode, Titan has some a new rotation with new abilities also
- Landslide (Pushback): Like in Titan Story mode, watch out for this frontal pushback ability, if you get hit chances are you will fall from the stage, and the moment one party member falls its practically a wipe.
- Tumult (AoE): Back with a vengeance, in post heart phase, Titan can dish out 6-8 Tumults in succession.
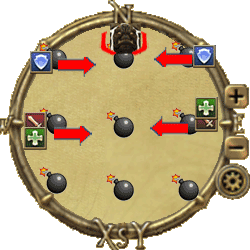
- Weight of the Land (Plumes): Another skill from Titan Story mode, this time with a vengeance. It’s important the team positions themselves so that when he casts this they can move away to a safe position.
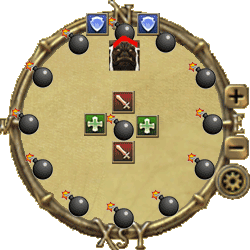
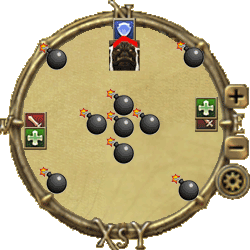
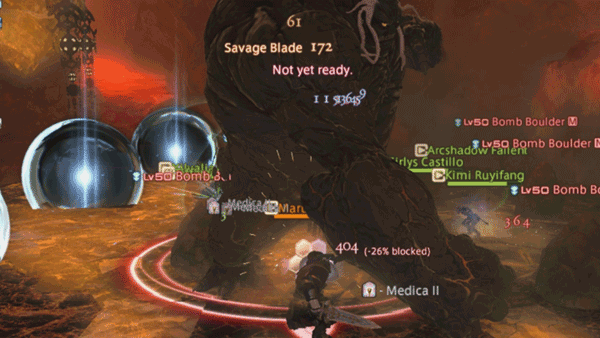
- Bomb Boulders: A new mechanic, Titan calls down bombs that explode in a certain pattern, there are 3 types to watch out for but the rule of thumb is, the first bomb to light up is the first bomb to go
- Type 1: Clockwise detonation, tanks will either take one bomb damage or hide between two bombs so they do not get hit (takes practice to hide believe me!)
- Type 2: We call this the easy bombs, just find a safespot in either the N,S,W or E areas of the map
- Type 3 (Post heart only) : This is where it gets tricky, 3 bombs get dropped parallel to each other. In this set the middle group of bombs always blow up first. So you want to stay where the last set will blow and immediately move to the middle once it blows up. (Titan usually casts Landslide right after these bombs show up, the moment he lets go of Landslide is when we move to the center)
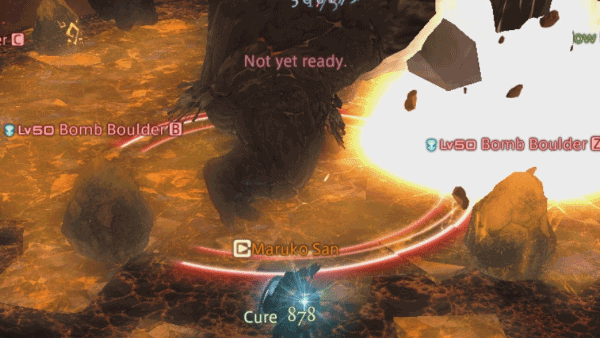
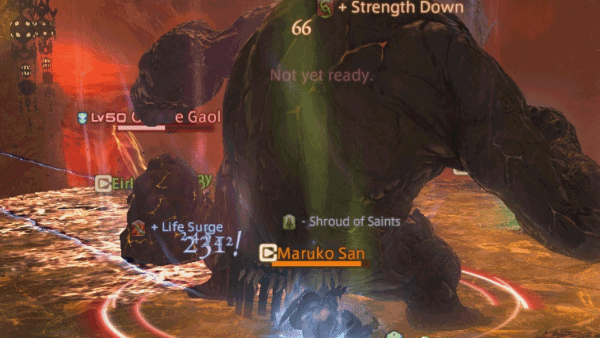
- Gaol: Much like the Story Mode mechanic, a random party member will get imprisoned and will be tagged with a determination down debuff (it’s important that the healers strip this debuff after the party member gets freed from the Gaol). Also, Titan sometimes casts Landslide on an imprisoned member of the team, make sure you wait till after he casts Landslide to free your team member.
- Geocrush (Jump): Just like in Story Mode, Titan Jumps up and after each jump the stage gets smaller, key position here is to group up so that healers can cast their AoE heals before going back into position
- Earthen Fury (Ultimate): Same mechanic in story mode, if you do not defeat his heart in enough time Earthen Fury will destroy you! This is a DPS check and you will need to your whatever limit break you have to kill the heart. We usually time this right after the last Weight of the Land in the heart phase.
- Mountain Buster: Heavy hitting frontal cone attack (never stay near the tank in this phase or you will fall. Tanks need to time their mitigation for this skill if they are not topped up.
General Strategy for roles:
Tank: Positioning is important, mitigation should be timed. You want to position Titan as close to the edge as possible to give your party enough space behind to move around and dodge ‘Weight of the Land’. Positioning is also important during the ‘Bomb Boulder‘ phases. In our FC, it is the tanks job to memorize Titan’s rotation and call out ‘Weight of the Land‘ and ‘Mountain Buster‘
Healer: Healers are the key to this fight, if one falls you are in for a ride! Positioning is important for healers to make use of their AoE abilities, after each Geocrush, Healers need to pre-cast their heals so the party gets topped up and during the post heart phase the healers need to ensure they top-up the tank before ‘Mountain Buster’ and also pre-cast AoE heals before he does ‘Tumult‘
DPS: All the DPS need to be careful of is avoiding Landslide, Weight of the Land and getting to know positioning during the bomb phases. They must also be conscious of their position so that the healers can have a place to run to when weight of the land hits.
Titan Hardmode Infographic
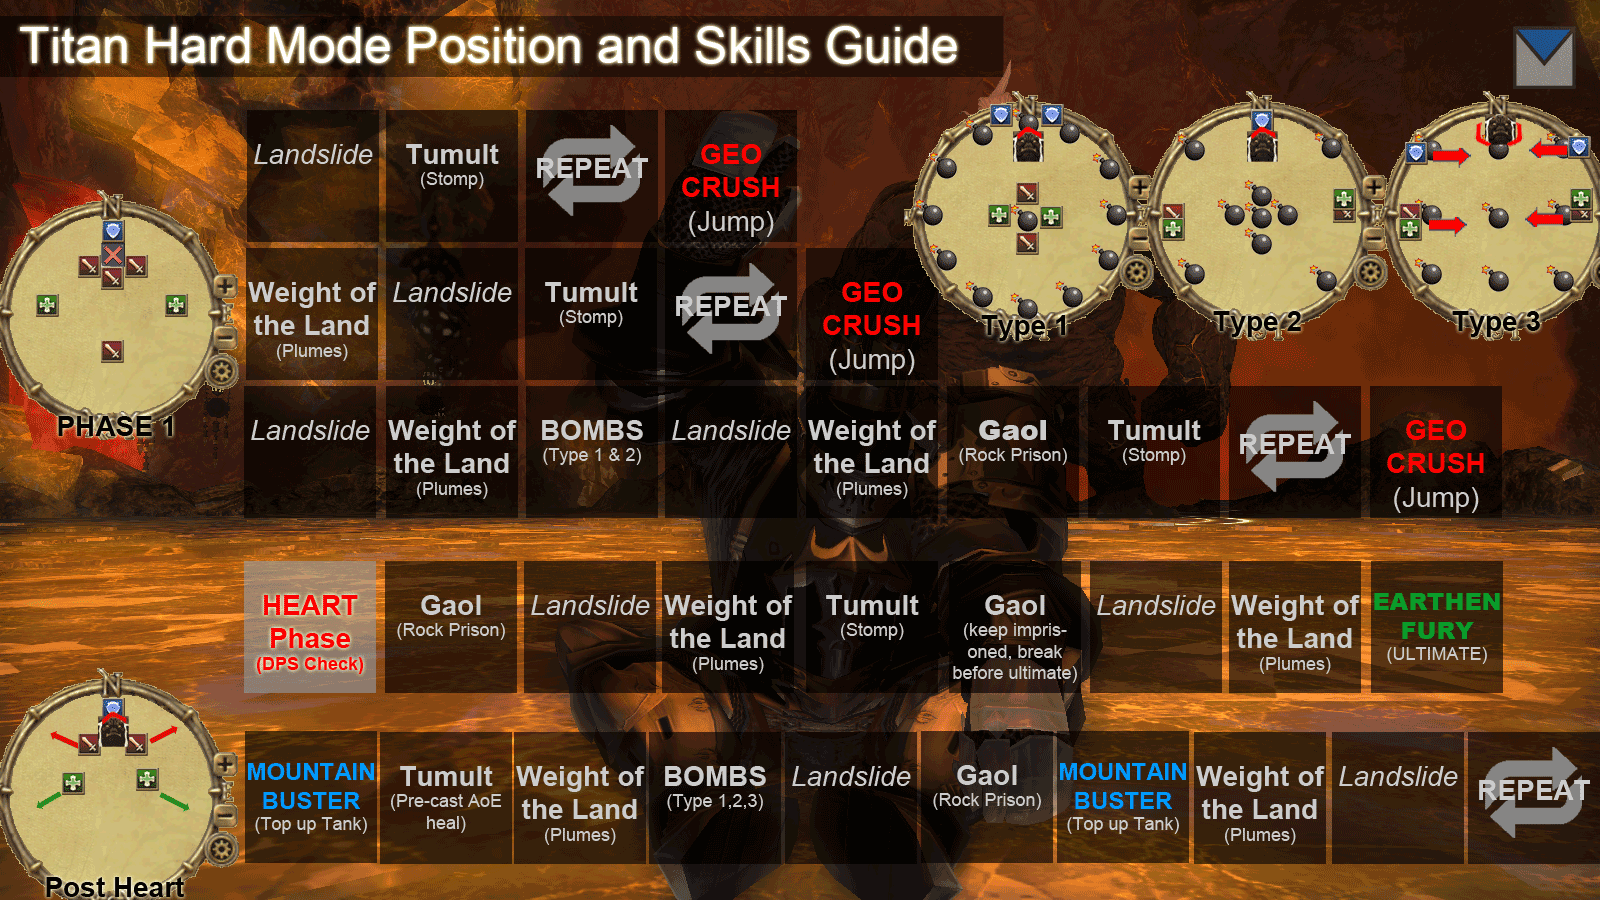
1st Phase (Pre-heart)
Skill rotation: Landslide, Tumult, GEOCRUSH (Jump), REPEAT > Weight of the Land, Landslide, Tumult, GEOCRUSH (Jump), REPEAT > Landslide, Weight of the Land, Bombs, Landslide, Weight of the Land, Gaol, Tumult, GEOCRUSH (Jump)
In the first phase we see Titan showcase some of his new abilities namely the Bomb Bomb rotations. This phase will test how well the group can dodge Landslide and Weight of the Land. You will also be able to get a feel for how much DPS your group can do. Remember to save DPS cooldowns for when he reaches the heart phase
2nd Phase (Heart) 50% life
Skill rotation: Gaol, Landslide, Weight of the Land, Tumult, Gaol, Landslide, Weight of the Land, EARTHEN FURY
One the heart pops out, pop all DPS cooldowns and make sure to free whoever is in a Gaol. Note that when he casts Gaol the second time, the party should ignore the Gaol and focus on defeating the heart. We suggest to use your limit break, whether level 1 or 2 right after he casts the last Landslide or Weight of the Land. Once the heart is defeated immediately focus your attention on the imprisoned party member, if they are not freed from the Gaol before he casts Earthen Fury, the party member will fall.
3rd Phase (Post-heart)
Skill rotation: Mountain Buster, Tumult, Weight of the Land, Bombs, Landslide, Gaol, Mountain Buster, Weight of the Land, Landslide
The scary phase here are the first 3, most specially for the healers who will need to ensure the tank is topped up just before Mountain Buster and immediately focus on healing the group in time for Tumult. Swiftcast for healers is an awesome and almost critical mitigating skill in this part of the fight.
The Bomb phase always takes first timers by surprise. The key to dodging the bombs in this phase is not to PANIC. in the Bombs Type 3, always remember that the middle bombs will explode first, simply find where the last exploding set of bombs are and stay in that area (dont be afraid to stand next to a bomb! you will need to move because he casts landslide) just remember to move to the center right after he lets go of landslide.
One more thing to note is that when he reaches about 25% life he increases the amount of Tumults he does from 6 to 8 times, this is where AoE healing and positioning is key.
Visual Notes on the Titan Hard Mode Fight
Dont Release your Party Members from the Gaol until after he casts landslide on them like so:
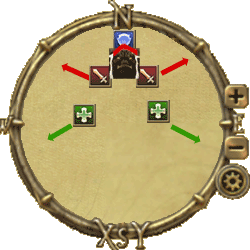
This is an example of Type 3 Bombs, in this case I move with the party to my left, and wait for Titan to cast landslide and then move to the middle

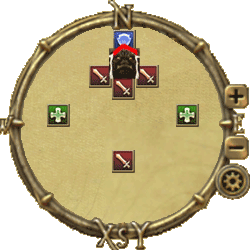
Sample Positioning for Weight of the Land

The three main reasons people die at Titan hard:
- Weight of the land: Your dps and healers should already look for where to run BEFORE weight of the land hits. Because of this, unnecessary movements should be avoided. If you know WHEN the next weight hits, and WHERE to run beforehand, you will dodge it 100% of the time, believe me.
- Type 3 Bombs: The triple line bomb formation is the reason most people die. To be honest, it’s largely because they panic. All non-tank players should simply move to the middle-bomb of the last set that spawned. Once titan punches the ground, move towards the center. Simple as that!
- Mountain Buster: Both the tank and the healers should be aware of when the next “table flip” occurs. Tanks can pop a cool-down, and healers can pre-cast shields and heals. Note that every random damage that happens to the raid makes it harder for healers to keep the tank up to 100%. As a DPS, you got one job: Avoid damage.
Finally, Good Luck in your fight with Titan!